
🍪 Bakery Style Chocolate Chip Cookies: The Ultimate Soft & Chewy Treat You’ll Love
1. Introduction
There’s nothing quite like the warm, buttery aroma of bakery style chocolate chip cookies fresh from the oven—golden edges, gooey centers, and rich, melty chocolate pockets that pull apart with every bite. Unlike the crispy, thin cookies you might get from a supermarket bag, these are intentionally underbaked just enough to stay pillowy-soft while still holding their shape. I’ve spent years perfecting this recipe through trial, error, and countless taste tests (yes, I’ve eaten dozens), and this version captures that unmistakable bakery magic right in your own kitchen.
2. Why You’ll Love This Recipe
- Bakery-worthy taste & texture—no compromises: Thick, chewy centers with crisp-edged contrast, just like your favorite local bakery.
- Ready in under 30 minutes: From prep to first cookie on the cooling rack, it’s fast, foolproof, and perfect for spontaneous cookie cravings.
- Make-ahead friendly: Freeze the dough balls and bake fresh whenever inspiration strikes.
- Minimal ingredients—maximum flavor: No fancy extras—just pantry staples and premium chocolate.
3. Ingredient Notes
Every component here plays a role—and substituting thoughtlessly can change the texture dramatically. Let me walk you through the *why* behind each pick:
- Brown butter (not optional!): I highly recommend browning the butter before mixing—it adds a deep, nutty aroma that transforms standard cookies into something extraordinary. Don’t skip this step!
- Dark brown sugar (not light): The molasses-rich dark brown sugar boosts chewiness and richness. Light brown sugar works in a pinch, but the flavor won’t be as robust.
- Chips vs. chunks: I use both. Semi-sweet chocolate chips hold their shape (giving you those classic pockets), while chopped dark chocolate bars (65–70%) melt into silken ribbons. My go-to: Guittard or Ghirardelli.
- Chilled flour? Yes! Whisk the flour and salt together, then let it rest in the fridge for 15 minutes before mixing. This stabilizes the dough temperature and prevents over-spreading.
4. Kitchen Tools You Need
While these cookies can be made with just a bowl and spoon, having the right tools can seriously elevate your kitchen workflow—especially for.batch baking:
For precise mixing and kneading freedom, the KitchenAid Artisan 5-Quart Stand Mixer in Scorched Orange is a joy—its powerful motor handles thick cookie dough with ease. If you prefer a more budget-friendly option, the KitchenAid Classic Iconic Stand Mixer delivers the same performance with a vintage touch.
Looking to keep your dough perfectly chilled? A Crock-Pot Family-Size Slow Cooker (yes, turned off!) can double as an ultra-stable low-temp environment for slow-chilling dough overnight. For clean-up efficiency, the T-fal 14-Piece Hard Anodized Nonstick Cookware Set includes versatile baking sheets with nonstick surfaces that make shifting hot cookie sheets a breeze.
And if you love storing baked goods in style, the JoyJolt Airtight Glass Food Storage Set keeps cookies fresh and visible—great for gifting or snagging one (or three) after dinner. For tracking family favorites, the Clever Fox DIY Family Recipe Journal is the perfect way to record your own tweaks and notes.
5. How to Make Bakery Style Chocolate Chip Cookies
Phase 1: Brown the Butter & Chill
Melt 1 cup (2 sticks) of unsalted butter in a light-colored saucepan over medium heat. Watch closely—it will foam, then sputter, then turn golden-brown with fragrant toasted solids settling at the bottom. Swirl the pan, remove from heat, and pour into a heatproof bowl. Stir in granulated sugar, then let cool 5 minutes. Mix in egg, vanilla, and brown sugar until smooth. Finally, whisk flour, baking soda, and salt in a separate bowl, then gradually fold into the wet ingredients. Stir in chips and chunks. Cover and refrigerate at least 2 hours (overnight is ideal for deeper flavor and less spread).
Phase 2: Scoop & Bake
Preheat oven to 350°F (175°C) and line baking sheets with parchment. Use a 3-tablespoon cookie scoop to fill dough balls—don’t roll too tightly; a slightly rough surface gives texture. Arrange 3 inches apart (they *will* spread). Sprinkle with flaky sea salt if desired. Bake for 10–12 minutes: edges should be firm and golden, centers still look underdone. Let rest on the sheet for 10 minutes—they’ll firm up beautifully as they cool.
Phase 3: Cool & Savor
Transfer to a wire rack gently. Let cool completely—or try not to—and enjoy that first warm, chocolate-streaked bite. Store in an airtight container for up to 5 days, or freeze dough balls for up to 3 months.
6. Expert Tips for Success
- Freeze your baking sheet before scooping: Place your empty sheet in the oven while preheating, then slide it out and place dough directly on the hot surface—this sets the base faster and limits spread.
- Underbake for chew: The cookies will continue cooking after removal. Pull them out when centers look moist and slightly domed, notflat or fully set.
- Don’t overmix after adding flour: Stop as soon as no dry streaks remain. Overmixing = tough cookies.
- Rack rotation helps: If your oven has hot spots, swap the sheet front-to-back halfway through baking.
7. Variations & Substitutions
Craving variety? Try these riff ideas:
- Peanut Butter Swirl: Drop 1 tsp peanut butter on each dough ball before baking and gently swirl with a knife.
- Sea Salt & Caramel: Press a small piece of chewy caramel into each dough ball before baking, then finish with flaky sea salt.
- Dairy-free: Use plant-based butter (like Miyoko’s) and dairy-free chocolate chips—texture remains great.
- Gluten-free: Swap all-purpose for a 1:1 GF blend like Bob’s Red Mill (ensure xanthan gum is included).
8. Storage & Reheating
Cooled cookies store well in an airtight container at room temperature for up to 5 days. For longer storage, freeze for up to 3 months—thaw at room temperature or microwave for 15 seconds. To reheat, place on a baking sheet and warm in a 300°F oven for 3–5 minutes for that fresh-from-the-oven texture. Avoid the microwave alone—it can make edges rubbery.
9. FAQ
Why do my cookies spread too much?
Too much butter, warm dough, or an overheated oven can cause spreading. Ensure your butter is browned *and fully cooled*, dough is chilled for at least 2 hours, and your oven is accurately calibrated (an oven thermometer helps!).
Can I make these gluten-free?
Yes—use a high-quality 1:1 gluten-free flour blend (like King Arthur or Bob’s Red Mill), and add ¼ tsp xanthan gum if your blend doesn’t include it.
What’s the best chocolate for cookies?
A mix of chips and chopped chocolate yields the best texture. I love Guittard’s 66% chocolate bars chopped by hand—they melt beautifully without turning gummy.
Can I double the batch?
Absolutely! In fact, I recommend freezing half the dough to bake later. portion into balls, store in labeled freezer bags, and pop in the oven straight from frozen (add 1–2 minutes to bake time).
10. Conclusion
This bakery style chocolate chip cookies recipe has stood the test of time in my kitchen—and in the hearts of friends, family, and neighbors. With its deep caramel notes, melty chocolate streaks, and satisfying chew, it’s proof that a few thoughtful tweaks can take your cookies from ordinary to extraordinary. Whip up a batch tonight and smell the joy rolling in—you’ve just made your kitchen feel like a bakery. And if you love rich, comforting treats, don’t miss our Ultimate Moist Chocolate Banana Bread or Sweet & Spicy Honey Pepper Chicken next.
Print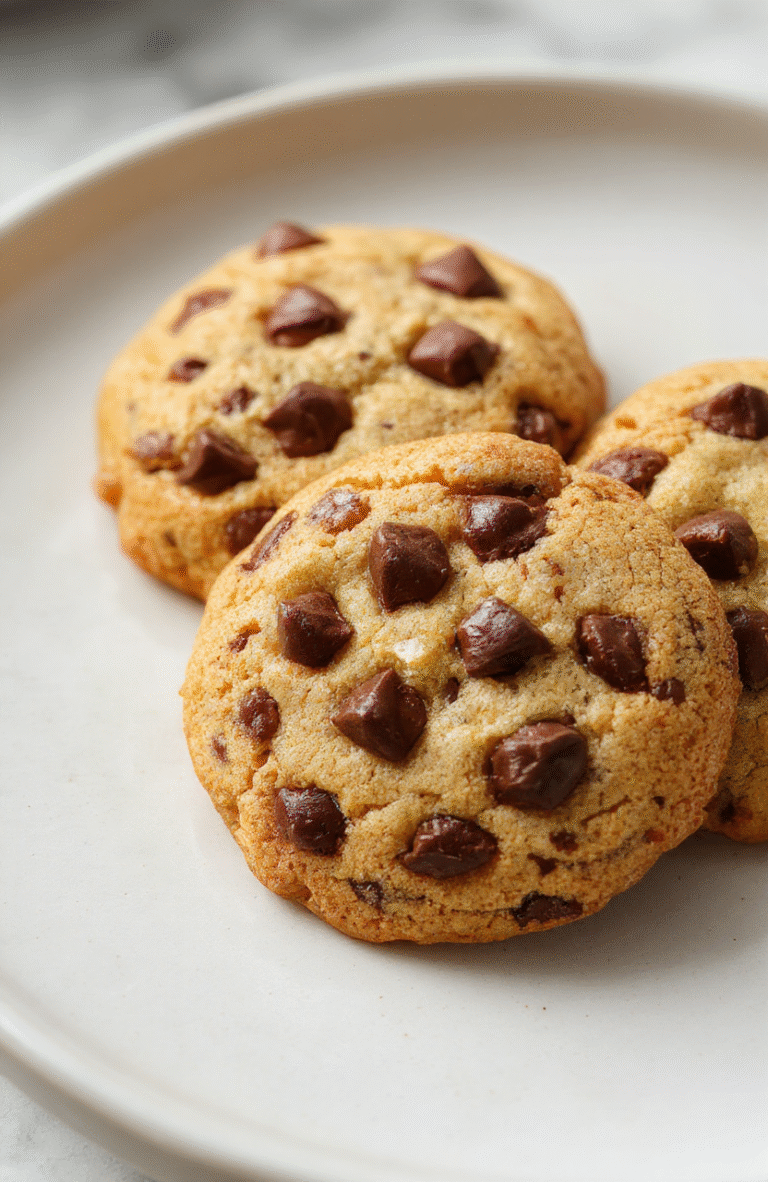
Bakery Style Chocolate Chip Cookies
These cookies deliver bakery-level texture and flavor with a secret trick: chilling the dough for at least 24 hours and using browned butter for depth.
- Total Time: 25 minutes plus chilling
- Yield: 24 cookies 1x
Ingredients
- 2 1/4 cups all-purpose flour
- 1 tsp baking soda
- 1 tsp salt
- 1 cup (2 sticks) unsalted butter, browned and cooled
- 3/4 cup granulated sugar
- 3/4 cup packed light brown sugar
- 2 large eggs, room temperature
- 1 tsp vanilla extract
- 2 cupssemisweet chocolate chips
- 1 cup chopped walnuts or pecans (optional)
Instructions
- Brown the butter in a saucepan until nutty-smelling and golden, then cool to room temperature.
- In a bowl, whisk flour, baking soda, and salt; set aside.
- In a large bowl, beat both sugars with the browned butter until smooth. Add eggs one at a time, then mix in vanilla.
- Gradually fold in the dry ingredients, then stir in chocolate chips and nuts (if using).
- Chill dough for 24–72 hours (this is key for texture!).
- Preheat oven to 375°F (190°C). Scoop dough into 3-Tbsp balls, space 2 inches apart on parchment-lined sheets.
- Bake 10–12 minutes until edges are golden and centers are soft.
- Cool on pan 5 minutes before transferring to wire rack.
Notes
- For extra chewiness, use bread flour in place of half the all-purpose flour.
- If short on time, freeze cookies uncooked and bake straight from the freezer (add 1–2 minutes to bake time).
- Don’t skip the chilling — it deepens flavor and prevents spreading.
- Prep Time: 20 minutes
- Cook Time: 12 minutes
- Method: Baking
- Cuisine: American
- Diet: Vegetarian
Nutrition
- Serving Size: 1 cookie
- Calories: 180 Kcal
- Sugar: 12g
- Sodium: 135mg
- Fat: 9g
- Saturated Fat: 5g
- Unsaturated Fat: 3g
- Trans Fat: 0g
- Carbohydrates: 23g
- Fiber: 1g
- Protein: 2g
- Cholesterol: 30mg