🍯 Sticky Brown Sugar Garlic Chicken – A Sweet & Savory Dinner That Wins Every Time
1. Introduction
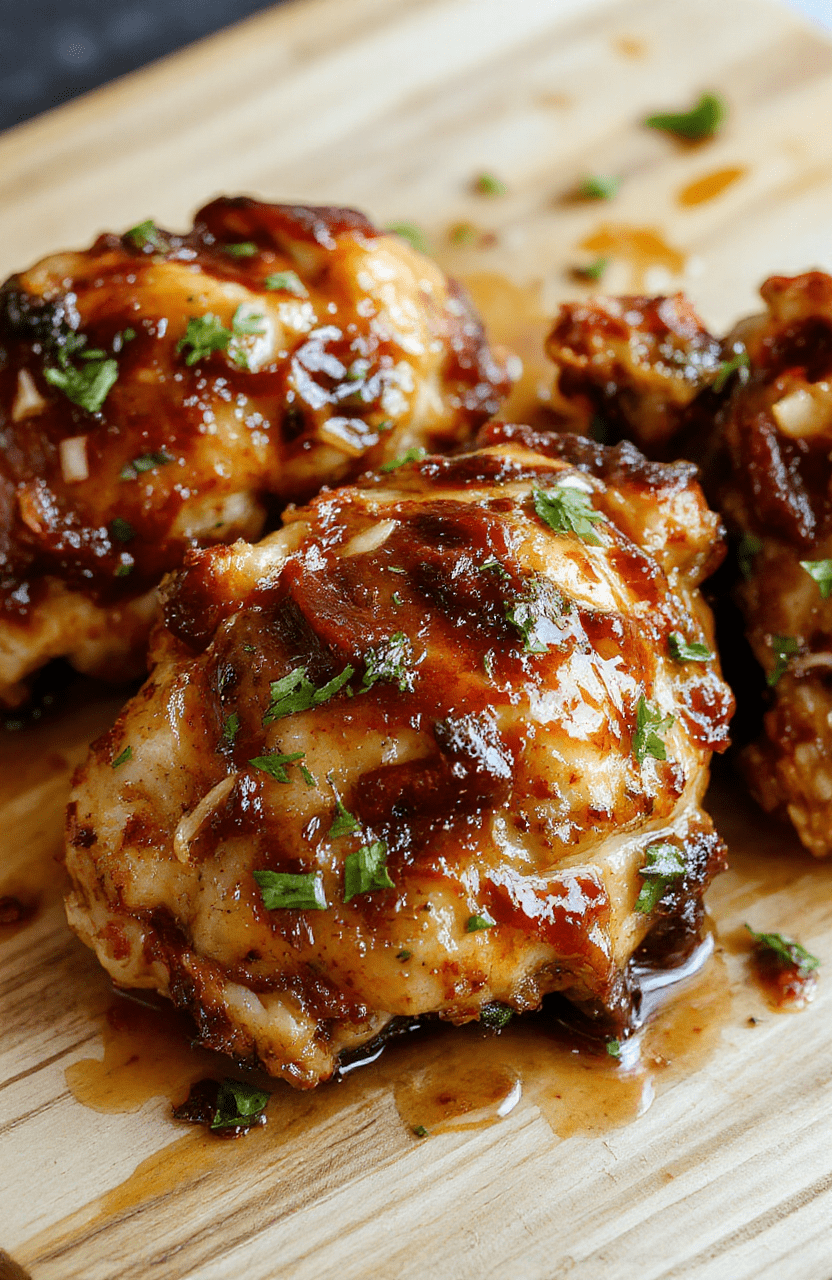
There’s something truly magical about a sticky brown sugar garlic chicken dinner that sizzles in the pan and coats your fork in glossy, caramelized goodness. This easy one-pan chicken dish delivers bold garlic depth balanced by rich, molasses-kissed brown sugar—and the result is a garlic glazed chicken that sticks to the ribs (and your memory). Perfectly tender, slightly charred at the edges, and glazed to perfection, it’s the kind of sweet and savory chicken dinner families come back for again and again. Whether you’re rushing home after work or planning a cozy Sunday meal, this recipe responds with zero fuss and maximum flavor.
2. Why You’ll Love This Recipe
- Ready in 30 minutes — Minimal prep, maximum reward.
- One-pan wonder — Fewer dishes and more flavor development from the pan drippings.
- Sticky, glossy glaze — The kind that clings to the chicken and your memory (and maybe even your spoon).
- Family-friendly & crowd-pleasing — Even picky eaters swoon for this combo of sweet, savory, and garlicky.
- Versatile sides pairing — Pairs beautifully with roasted veggies, rice, mashed potatoes, or even over noodles.
3. Ingredient Notes
Every component of this recipe plays a role — even the salt. Here’s how to get it right:
- Dark brown sugar — Not light brown. Dark brown sugar has more molasses, delivering deeper caramel notes and that signature sticky glaze.
- Fresh garlic, minced — Bottled garlic lacks the punch; go fresh for that aromatic kick that mellows beautifully in the heat.
- Soy sauce (or tamari for gluten-free) — Adds umami and saltiness to balance the sweetness. Low-sodium is recommended so you control the salt level.
- Apple cider vinegar — A splash of acidity cuts through the richness and helps the glaze thicken just right.
- Chicken thighs (boneless, skinless) — They’re forgiving and stay juicy even if you hit the *slightly overcooked* zone (no judgment here). Thighs also caramelize better than breasts in this high-glaze scenario.
- Ginger, grated (optional but highly encouraged) — Bright, zesty notes that lift the garlic and balance the sweetness.
4. Kitchen Tools You Need
Using the right tools makes this easy one-pan chicken come together smoothly and safely:
- For smaller kitchens or air-fryer fans, the Compact 6-in-1 Digital Air Fryer by Amazon Basics can yield a crispier outer glaze if you finish under the broiler. Just spray with a touch of oil and air fry for 2–3 minutes after pan-searing.
- The T-fal 14-Piece Hard Anodized Nonstick Cookware Set includes a heavy 12-inch skillet perfect for achieving that perfect sear *and* a smooth glaze with easy cleanup—no stubborn stuck-on sauce.
- Prefer oven-baked results? The Ninja Foodi Smart XL Indoor Grill & Air Fryer Combo delivers restaurant-grade char and a glossy finish, all without smoking up your kitchen.
5. How to Make Sticky Brown Sugar Garlic Chicken
Follow this step-by-step walkthrough — your nose will thank you before your first bite:
Phase 1: Prep & Marinate (10 minutes)
Whisk together ⅓ cup dark brown sugar, 3 minced garlic cloves, 2 tablespoons soy sauce, 1 tablespoon apple cider vinegar, and 1 teaspoon grated ginger (if using) in a small bowl. Pour over chicken thighs in a zip-top bag or shallow dish, turning to coat. Let sit for at least 10 minutes (or up to 4 hours for deeper flavor).
Phase 2: Sear & Glaze (15 minutes)
Heat 1 tablespoon peanut or avocado oil in a large ovenproof skillet over medium-high heat. Add chicken — *don’t crowd the pan* — and sear 4–5 minutes per side until golden brown. Reduce heat to low, pour in the marinade (reserve any leftover liquid), and simmer uncovered for 8–10 minutes. Watch closely as the sauce thickens into a glossy, syrupy glaze.
Phase 3: Finish & Serve (2 minutes)
Once the glaze clings to the chicken and reaches a sticky consistency, remove from heat. Let rest 2–3 minutes — the residual heat will thicken the sauce further. Garnish with toasted sesame seeds and sliced green onions for contrast and color.
6. Expert Tips for Success
- Don’t rush the sear — A deep golden crust locks in juices and gives the glaze something to cling to.
- Resist stirring too much during simmering — Let the sauce reduce in a controlled environment. Stirring can break up the glaze too early.
- Use a thermometer — Chicken thighs are safe at 165°F, but pull at 160°F — carryover heat will finish the job.
- Acidity is key — That splash of apple cider vinegar prevents the glaze from tasting cloying and adds balance.
7. Variations & Substitutions
- Sweetener swap — Substitute maple syrup or manuka honey for brown sugar (reduce liquid slightly — these are thinner).
- Spice it up — Add ½ teaspoon red pepper flakes or 1 tablespoon sriracha to the glaze for heat.
- Low-sodium version — Use tamari labeled “low sodium” and boost flavor with extra garlic, ginger, and a pinch of smoked paprika.
- Vegetarian version — Swap chicken for extra-firm tofu or seitan and follow the same sear-and-glaze method.
8. Storage & Reheating
Store leftovers in an airtight glass food container set for up to 4 days. The glaze will thicken in the fridge — to reheat, gently warm in a skillet over low heat with a splash of water or chicken broth to refresh the sauce. For best texture, avoid microwaving (it can make the chicken rubbery). That said, a quick 60-second zap works in a pinch — just cover with a damp paper towel.
9. FAQ
Can I use chicken breasts instead of thighs? Yes — but they’re leaner and dry out faster. Sear for 3–4 minutes per side and reduce simmer time to 5–6 minutes. Use a thermometer to avoid overcooking.
Why is my glaze too thick or too runny? Glaze thickness depends on simmer time and sugar content. If too thick, add 1 teaspoon of water or broth. If too thin, continue simmering uncovered — it will thicken as it cools.
Can I make this ahead? Absolutely. Marinate the chicken up to 24 hours in advance. Cook it, let it cool, and reheat gently. Or keep it raw in the fridge and cook when ready — perfect for meal prep.
What sides pair best? Try our Ultimate Moist Chocolate Banana Bread for contrast (yes, really!), or something savory like roasted asparagus and garlic mashed potatoes. For more dinner inspiration, explore our Dump-and-Go Smothered Pork Chops or Sweet & Spicy Honey Pepper Chicken.
10. Conclusion
This sticky brown sugar garlic chicken is more than just dinner — it’s comfort on a plate, the kind that smells like home and tastes like victory. From the sizzle of the pan to the glossy final drizzle, every step is designed for ease and soul-soothing flavor. Whether you serve it over jasmine rice, noodles, or straight from the skillet with a fork, this easy one-pan chicken delivers big-time — no fancy skills required. So grab your favorite skillet and get ready for requests for seconds. 🍚✨
Print
Sticky Brown Sugar Garlic Chicken
This ultra-tender sticky brown sugar garlic chicken features a luscious, glossy glaze made from brown sugar, garlic, soy sauce, and rice vinegar. Perfect for busy weeknights — ready in under 30 minutes and cooked entirely in one pan.
- Total Time: 25 minutes
- Yield: 4 servings 1x
Ingredients
- 1.5 lbs boneless, skinless chicken thighs, cut into 1-inch pieces
- 2 tbsp olive oil
- 3 tbsp brown sugar, packed
- 3 cloves garlic, minced
- 2 tbsp soy sauce (or tamari for gluten-free)
- 1 tbsp rice vinegar
- 1 tsp sesame oil
- 1/4 tsp red pepper flakes (optional)
- Sesame seeds and sliced green onions, for garnish
- Steamed rice and broccoli, for serving
Instructions
- Heat olive oil in a large skillet over medium-high heat. Add chicken and cook until golden brown and cooked through, 5–7 minutes.
- Stir in garlic and cook until fragrant, about 30 seconds.
- Reduce heat to low. Add brown sugar, soy sauce, rice vinegar, sesame oil, and red pepper flakes. Stir well to coat the chicken and simmer for 3–4 minutes, until sauce thickens and becomes glossy and sticky.
- Remove from heat and let rest 2 minutes — sauce will thicken further.
- Serve over rice with steamed broccoli, garnished with sesame seeds and green onions.
Notes
- For extra caramelization, Broil on high for 1–2 minutes at the end — watch closely!
- Can be made ahead and reheated — sauce thickens more on standing; thin with a splash of water or broth if needed.
- Use chicken breasts if preferred, but reduce cooking time to avoid dryness.
- Prep Time: 10 minutes
- Cook Time: 15 minutes
- Method: Skillet
- Cuisine: Asian-inspired
- Diet: Dairy-free
Nutrition
- Serving Size: 1 serving (about 1 cup)
- Calories: 298 Kcal
- Sugar: 13g
- Sodium: 612mg
- Fat: 11g
- Saturated Fat: 3g
- Unsaturated Fat: 7g
- Trans Fat: 0g
- Carbohydrates: 22g
- Fiber: 1g
- Protein: 26g
- Cholesterol: 85mg