Sal’s Pizza: A Cheesy Delight for Every Pizza Lover 🍕😍🍅
1. Introduction to Sal’s Pizza
Welcome to the delightful world of Sal’s Pizza! If you’re searching for a mouthwatering addition to your sal’s pizza menu, you’ve landed in the perfect spot. This article is your ultimate guide to crafting the ideal Sal’s pizza right in your own kitchen. Imagine combining a bubbly, cheesy masterpiece with the freshest, most vibrant ingredients – that’s the Sal’s Pizza experience! Whether you’re gearing up for a cozy family dinner, a lively gathering with friends, or simply a relaxing night in, Sal’s Pizza is guaranteed to be the ultimate crowd-pleaser! Discover how simple it is to elevate your homemade pizza game and explore new dimensions of flavor. Looking for appetizers to go along with your pizza? Then check out these Turkey Gizzard recipes!
2. Essential Ingredients for Your Sal’s Pizza Menu
Before we begin, let’s make sure you have everything you need to create your very own stunning Sal’s Pizza. Gather the following high-quality ingredients to ensure an authentic and unforgettable taste:
- 2 cups all-purpose flour (for the perfect crust texture)
- 1 packet (2 1/4 teaspoons) active dry yeast (to achieve that airy, light dough)
- 1 cup warm water (100-110°F) (essential for activating the yeast)
- 1 tablespoon olive oil (adds richness and enhances the dough’s elasticity)
- 1 teaspoon sugar (helps activate the yeast and adds a hint of sweetness)
- 1 teaspoon salt (balances flavors and strengthens the dough)
- 1 cup homemade or store-bought tomato sauce (the flavorful base of your pizza)
- 2 cups shredded mozzarella cheese (for the ultimate cheesy, melty goodness)
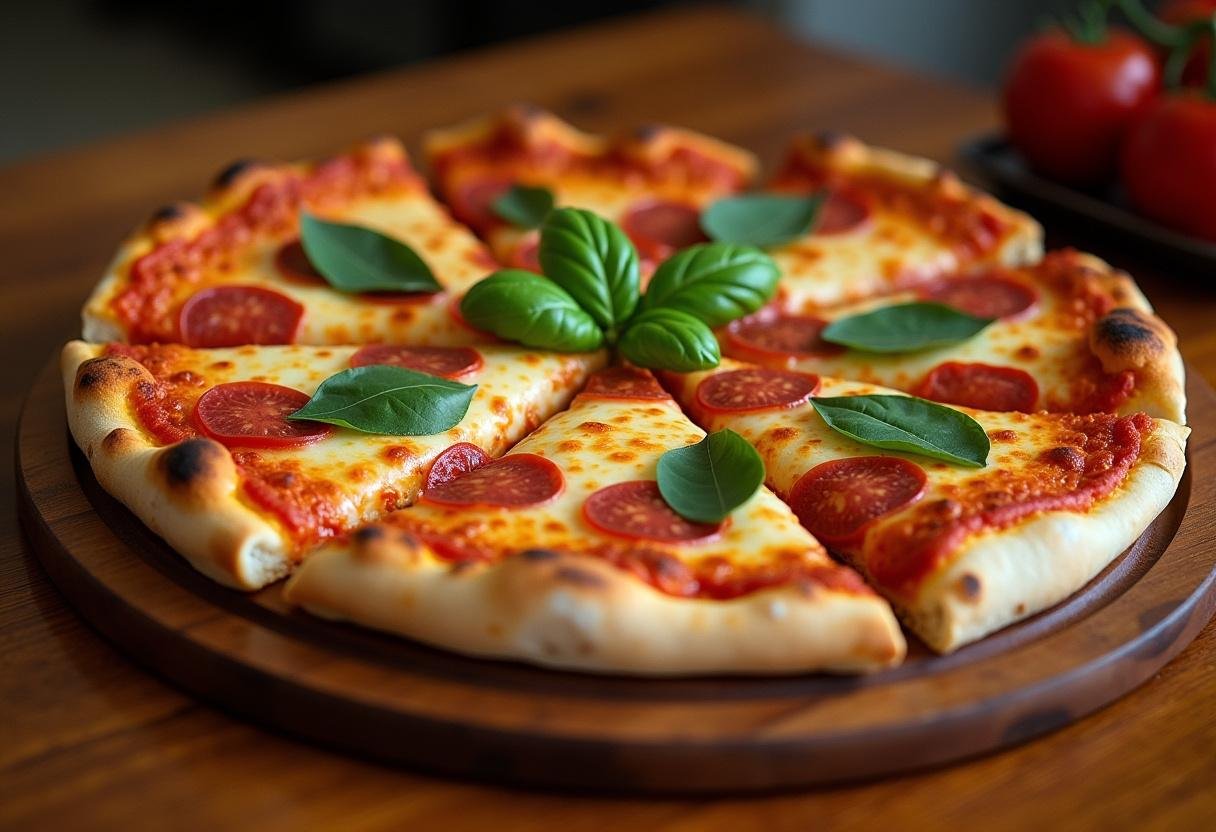
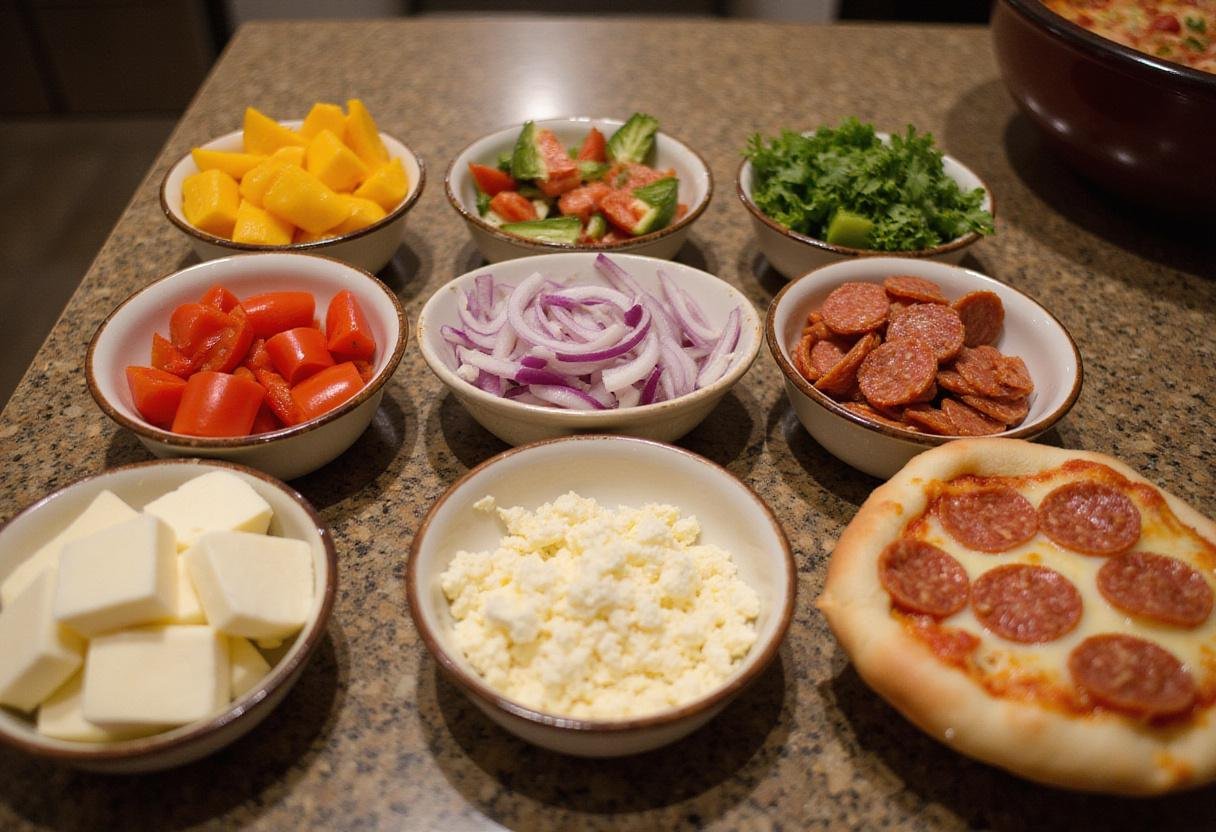
- Your choice of toppings (pepperoni, bell peppers, onions, olives, mushrooms, sausage – the possibilities are endless!)
3. Crafting Sal’s Pizza: Step-by-Step Instructions
Step 1: Prepare the Dough – The Foundation of Your Sal’s Pizza
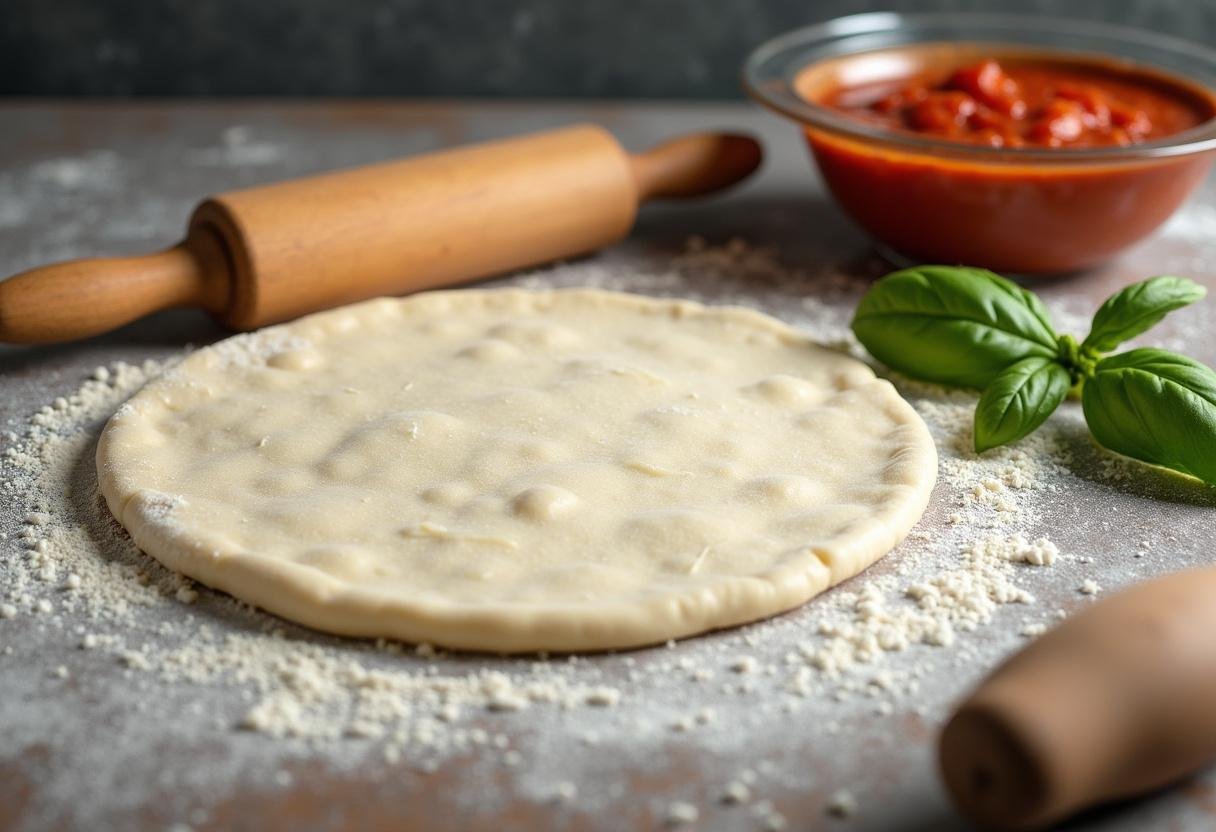
Let’s start with the heart of any great pizza: the dough. Begin by combining the warm water, yeast, and sugar in a bowl. Give it a gentle stir and allow it to sit for about 5-10 minutes. You’ll know it’s ready when the mixture becomes frothy and bubbly – this indicates the yeast is active and ready to work its magic. In a larger mixing bowl, combine the flour and salt. Gradually add the yeast mixture and olive oil to the flour, mixing until a shaggy dough begins to form. Make sure all ingredients are well incorporated for the best results.
Step 2: Knead, Rise, and Shine – Perfecting the Sal’s Pizza Dough
Now comes the fun part – kneading! Once your dough forms, turn it out onto a lightly floured surface. Knead the dough with love and care for about 8-10 minutes until it transforms into a smooth and elastic masterpiece. The kneading process is crucial for developing the gluten, which gives the pizza its chewy texture. After kneading, place the dough in a lightly oiled bowl, ensuring it’s coated to prevent sticking. Cover the bowl with a damp towel or plastic wrap. Let it rise in a warm place for about 1 hour, or until it has doubled in size. This rising period is essential for creating a light and airy crust that’s characteristic of a perfect sal’s pizza menu item.
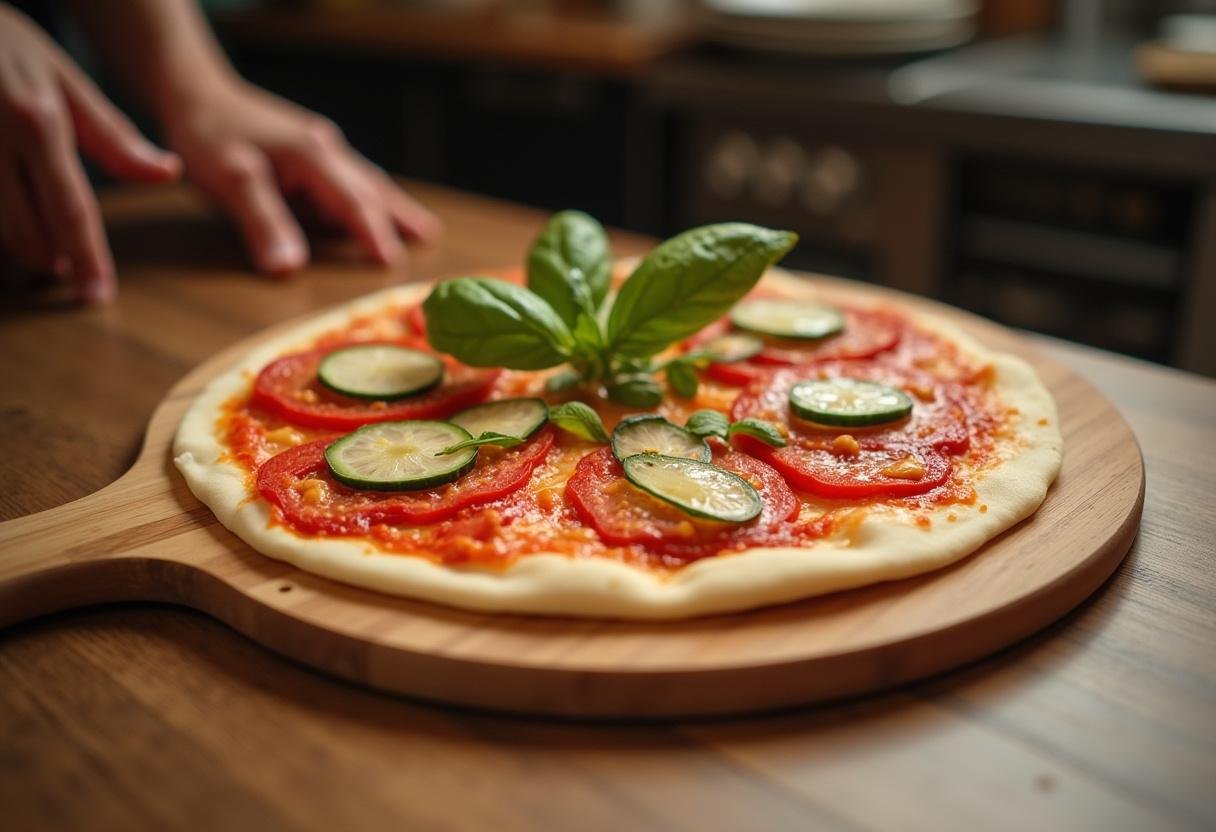
Step 3: Assemble Your Masterpiece – Crafting the Sal’s Pizza of Your Dreams
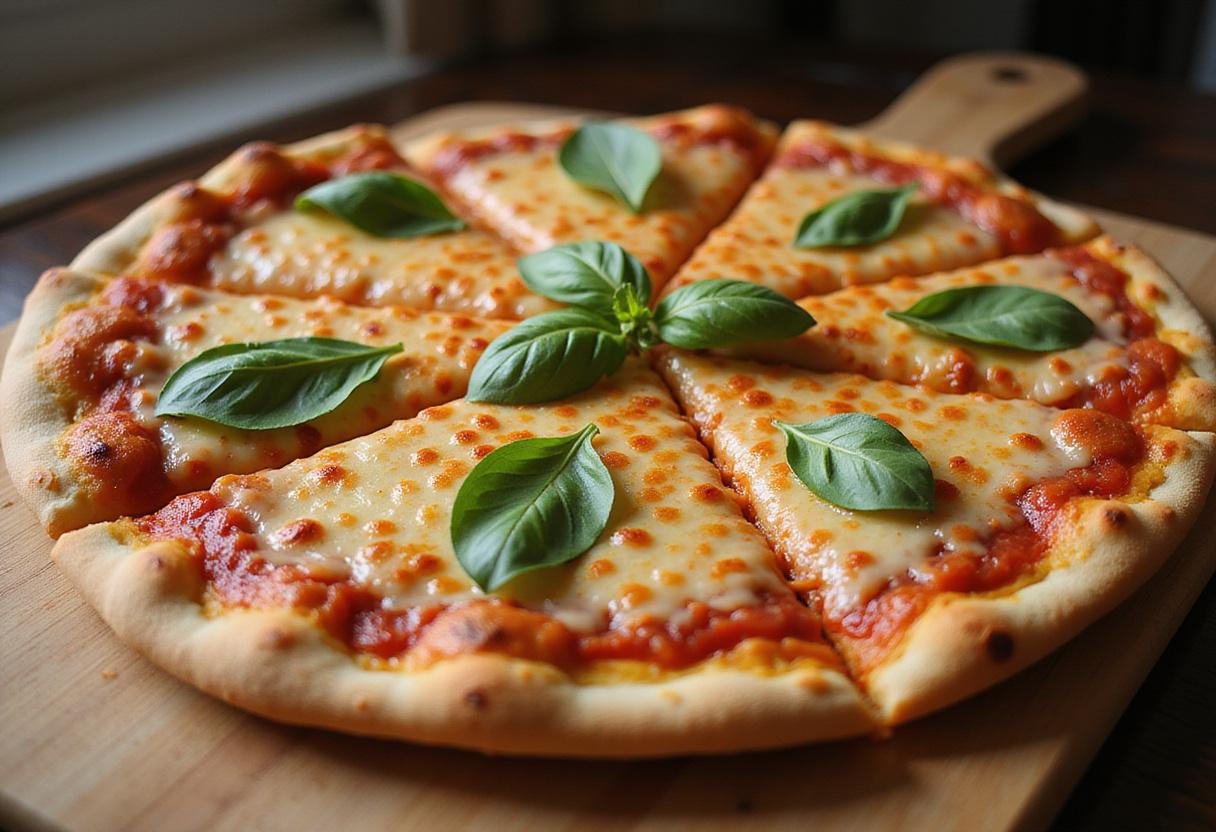
Preheat your oven to a sizzling 475°F (245°C). This high temperature is key to achieving a crispy, golden crust. Once the dough has gloriously risen, gently punch it down to release any excess air. Roll it out on a floured surface to your desired thickness – whether you prefer a thin, crispy crust or a thicker, more substantial base. Transfer the rolled-out dough carefully onto a pizza peel or a baking sheet dusted with cornmeal to prevent sticking. Spread a generous amount of your chosen tomato sauce evenly over the base, leaving a small border for the crust. Then, generously sprinkle with shredded mozzarella cheese, creating a luscious, melty layer. Now, it’s time to get creative with your toppings! Arrange your favorite ingredients – pepperoni, bell peppers, onions, olives, mushrooms, and more – to create a pizza that’s uniquely yours. For a simple side to the pizza, check out these Reser’s Potato Salad recipes.
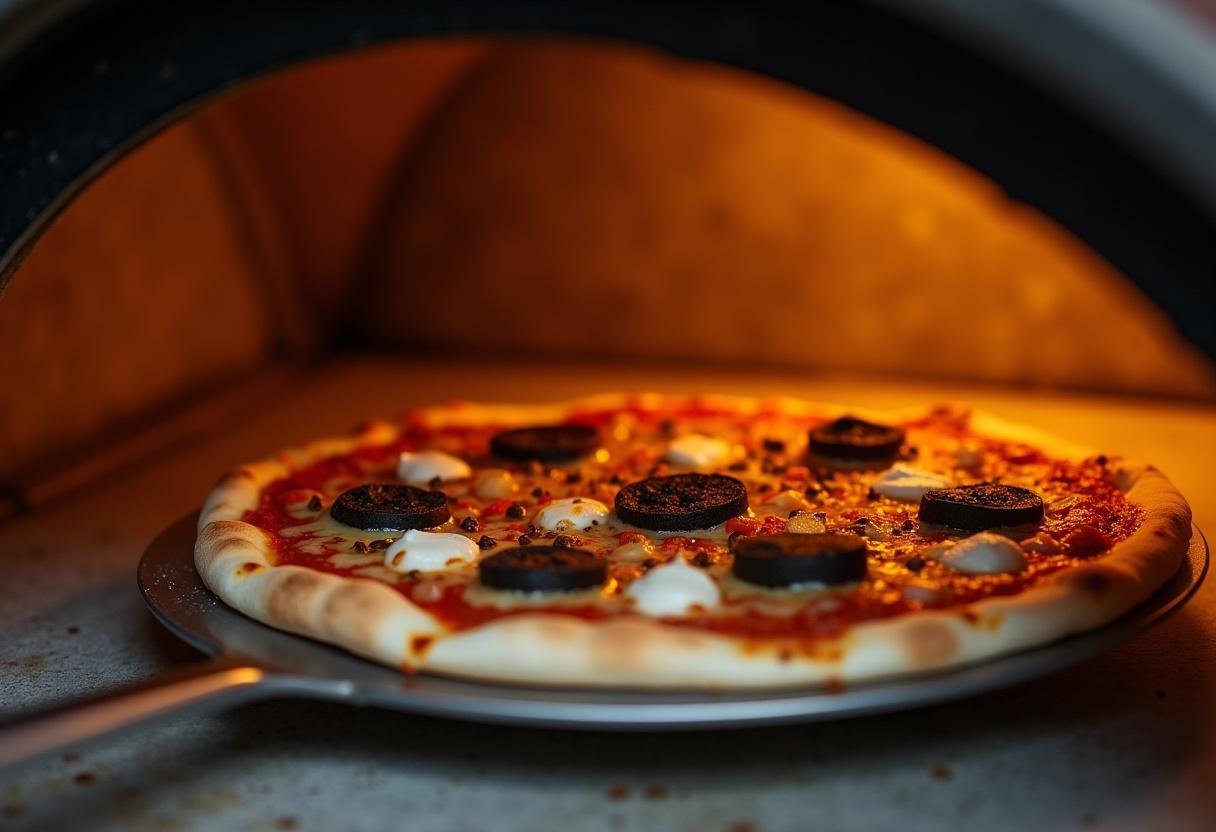
Step 4: Bake to Perfection – The Grand Finale of Your Sal’s Pizza Creation
Carefully slide your assembled pizza into the preheated oven, either directly onto the baking stone or with the baking sheet. Bake for approximately 10-12 minutes, keeping a close eye on it. You’ll know it’s ready when the crust turns a beautiful golden brown and the cheese is irresistibly bubbling and melted to perfection. Remove the pizza from the oven and let it cool for a few minutes before slicing. This allows the cheese to set slightly, preventing it from sliding off. Finally, slice into wedges and savor the delightful taste of your homemade Sal’s Pizza, fresh and hot from the oven! The aroma alone is enough to make anyone’s mouth water, a true testament to the deliciousness of a well-crafted sal’s pizza menu item. For a lighter option with your pizza, learn more about this Sweet Fluffy Pancake Bread.
4. Expert Storage Tips for Preserving Your Sal’s Pizza
So, you’ve made a Sal’s Pizza, and it’s truly a work of art! But what happens if you have leftovers? Don’t worry; we’ve got you covered with these essential storage tips. To store any leftover Sal’s Pizza, ensure it cools completely before wrapping it securely in plastic wrap. Alternatively, you can place the slices in an airtight container to maintain their freshness. Stored properly, your pizza can stay delicious in the refrigerator for up to 3 days. For longer storage, freezing is an excellent option. Place the slices in a freezer-safe bag, removing as much air as possible to prevent freezer burn. Frozen pizza slices can last for up to 3 months. When you’re ready to enjoy them again, simply reheat in the oven for a crispy crust that tastes almost as good as fresh!
5. Serving Suggestions for the Ultimate Sal’s Pizza Experience
Your delicious Sal’s Pizza is ready, but how can you elevate the dining experience? Serve it with a delightful side of garlic bread, perfectly toasted and seasoned, to complement the pizza’s flavors. A fresh garden salad, drizzled with your favorite dressing, adds a refreshing contrast. For a truly satisfying meal, pair your Sal’s Pizza with a chilled beverage. Soda is a classic choice, or you can opt for homemade lemonade for a refreshing, citrusy twist. If you’re in the mood for something heartier, consider Beef Sausage Links.
6. Frequently Asked Questions (FAQs) About Sal’s Pizza
Q: What are the best toppings to include in my own sal’s pizza menu to offer variety?
A: The beauty of Sal’s Pizza is its versatility! Some universally loved toppings include pepperoni, bell peppers (for that added crunch and sweetness), onions (for a savory kick), mushrooms (for an earthy flavor), and olives (for a briny punch). However, feel free to let your creativity shine and customize it according to your personal preferences and dietary needs!
Q: I’m short on time – can I use store-bought dough for my Sal’s Pizza?
A: Absolutely! While homemade dough adds a special touch, using store-bought pizza dough is a convenient and time-saving option when you’re in a rush. Just ensure you choose a high-quality dough for the best results. You can still achieve a delicious Sal’s Pizza with this shortcut!
Q: How can I ensure my Sal’s Pizza has a crispy crust?
A: Achieving a crispy crust is all about technique. Firstly, preheat your baking stone or pizza pan in the oven before placing the pizza on it. This helps to create a hot surface that crisps the bottom of the crust. Secondly, avoid overloading the pizza with excessive toppings, as this can make the crust soggy. Also, consider using a pizza screen for better air circulation. Enjoy your crispy, delectable Sal’s Pizza!
7. Conclusion: Your Sal’s Pizza Adventure Awaits
Creating Sal’s Pizza at home is not just about making a meal; it’s about embarking on a fun and satisfying culinary adventure. This easy-to-follow recipe is designed to elevate your sal’s pizza menu and impress even the most discerning palates among your friends and family. So, roll up your sleeves, gather your favorite fresh ingredients, and dive into the joy of crafting a delicious slice of homemade Sal’s Pizza. The experience is bound to be as rewarding as the scrumptious pizza you create! Discover more dinner ideas.
Click here to learn more about Sal’s Pizza and its history. Print
Sal’s Pizza
Sal’s Pizza: A Cheesy Delight for Every Pizza Lover. This easy-to-follow recipe combines bubbly, cheesy goodness with fresh ingredients to create the perfect crowd-pleaser for family gatherings or casual nights in.
- Total Time: 1 hour 32 minutes
- Yield: 8 slices 1x
Ingredients
- 2 cups all-purpose flour
- 1 packet (2 1/4 teaspoons) active dry yeast
- 1 cup warm water (100-110°F)
- 1 tablespoon olive oil
- 1 teaspoon sugar
- 1 teaspoon salt
- 1 cup homemade or store-bought tomato sauce
- 2 cups shredded mozzarella cheese
- Your choice of toppings (pepperoni, bell peppers, onions, olives, etc.)
Instructions
- Combine warm water, yeast, and sugar. Let sit for 5-10 minutes until frothy.
- Mix flour and salt in a larger bowl. Add yeast mixture and olive oil to form dough.
- Knead on a floured surface for 8-10 minutes until smooth. Let rise in a lightly oiled bowl for 1 hour.
- Preheat oven to 475°F (245°C). Roll out dough and place on a pizza peel. Spread tomato sauce, cheese, and toppings.
- Bake for 10-12 minutes until crust is golden and cheese is bubbling. Let cool slightly before slicing.
Notes
- Store leftovers wrapped in plastic wrap or airtight container for up to 3 days.
- Freeze slices in a freezer-safe bag for up to 3 months.
- Reheat in the oven for a crispy crust.
- Prep Time: 20 minutes
- Cook Time: 12 minutes
- Category: Pizza
- Method: Baking
- Cuisine: Italian
- Diet: Vegetarian
Nutrition
- Serving Size: 1 slice
- Calories: 250 Kcal
- Sugar: 1g
- Sodium: 410mg
- Fat: 10g
- Saturated Fat: 3g
- Unsaturated Fat: 5g
- Trans Fat: 0g
- Carbohydrates: 34g
- Fiber: 2g
- Protein: 9g
- Cholesterol: 15mg