Protein Cheesecake: Indulge in a Healthy Delight 🧀💪🍓
1. Introduction: Discover the Delight of Protein Cheesecake
If you’re searching for a dessert that combines indulgence with nutrition, look no further than this protein cheesecake. Bursting with flavor and loaded with protein, this dessert is perfect for anyone who wants to satisfy their sweet tooth without sacrificing their health goals. Whether you’re fueling up post-workout or simply craving a delicious treat, this protein cheesecake is a guilt-free option that doesn’t skimp on taste. Get ready to dive into a creamy, dreamy world of cheesecakey goodness, a delightful twist on traditional desserts!
This recipe offers a delicious alternative to heavier cheesecakes, ensuring you can enjoy a sweet treat while staying aligned with your dietary goals. Imagine a dessert that not only tastes amazing but also contributes to your daily protein intake – that’s the magic of a well-crafted protein cheesecake. You can even try some sweet glazed apple fritters after this delicious cheesecake; click here to view: Sweet Glazed Apple Fritters.
2. Ingredients: What You’ll Need for Your Protein Cheesecake
To create this delectable protein cheesecake, gather the following ingredients:
- 1 ½ cups crushed graham crackers
- ½ cup unsalted butter, melted
- 16 oz cream cheese, softened
- 1 cup protein powder (vanilla or your choice)
- ½ cup Greek yogurt
- ½ cup honey or maple syrup
- 3 large eggs
- 1 tsp vanilla extract
- Fresh berries for topping
These ingredients combine to create a smooth, creamy, and protein-packed dessert that’s both satisfying and nutritious. Each component plays a crucial role in the final taste and texture of your protein cheesecake. For a lighter option, consider using reduced-fat cream cheese or exploring alternative sweeteners.
3. Preparation Steps: Crafting Your Perfect Protein Cheesecake
Step 1: Prepare the Crust
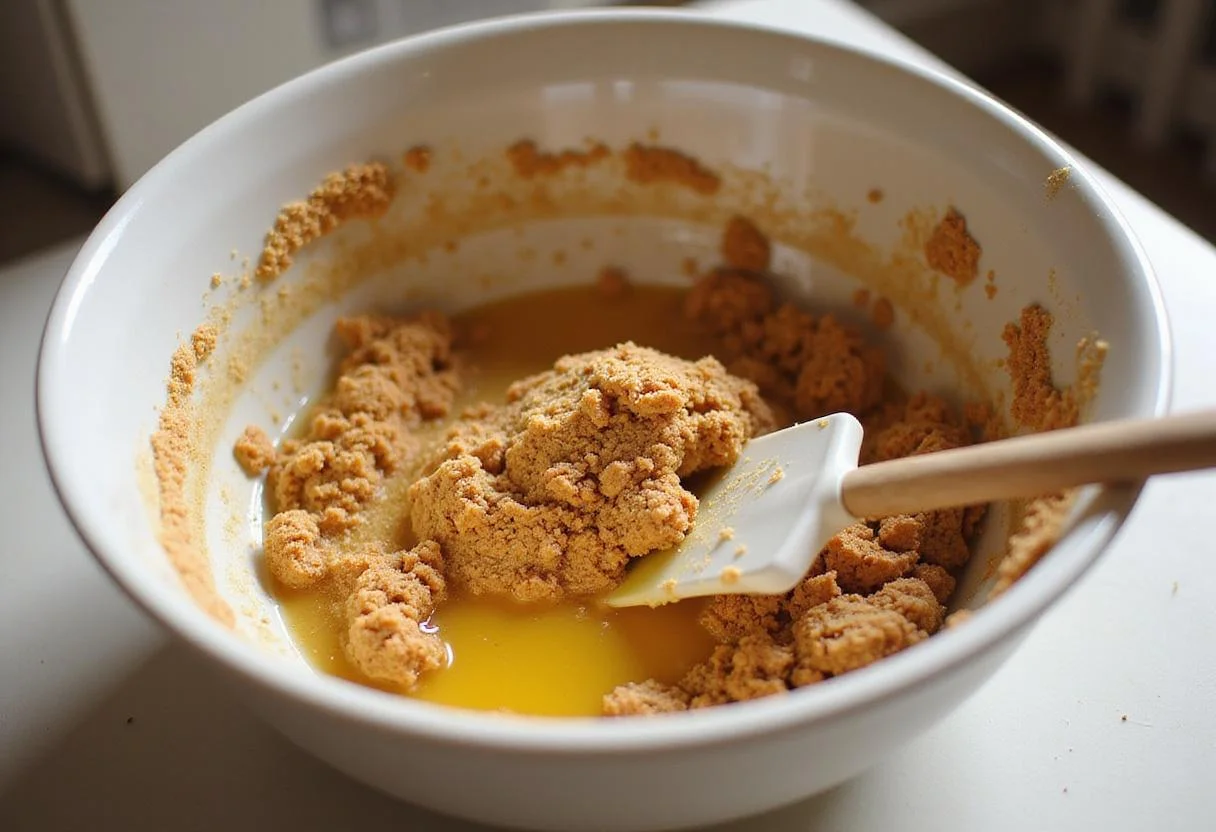
Start by preheating your oven to 350°F (175°C). In a mixing bowl, combine the crushed graham crackers and melted butter until well-blended. Press this mixture firmly into the bottom of a springform pan, creating an even layer. This step forms the delicious base of your protein cheesecake, providing a satisfying and slightly crunchy contrast to the creamy filling. Ensure the crust is evenly distributed for optimal texture.
Step 2: Create the Filling
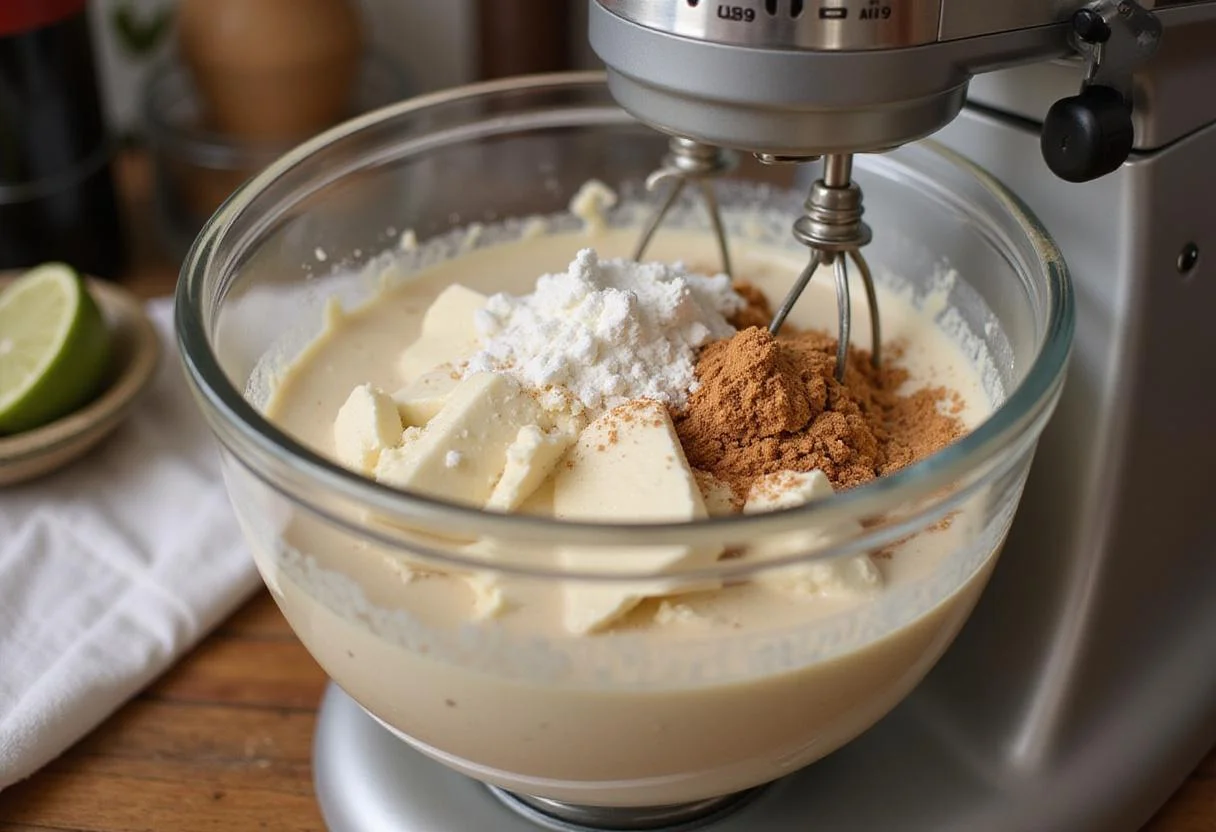
In a large mixing bowl, blend the softened cream cheese and protein powder until smooth. Slowly add the Greek yogurt, honey (or maple syrup), eggs, and vanilla extract, continuing to blend until the mixture is perfectly creamy. This filling forms the heart of your protein cheesecake and ensures each bite is packed with flavor and nutrition! Be sure to scrape down the sides of the bowl to ensure all ingredients are fully incorporated, creating a uniformly smooth texture. You can find some perfect ice cream cups here: Perfect Ice Cream Cups
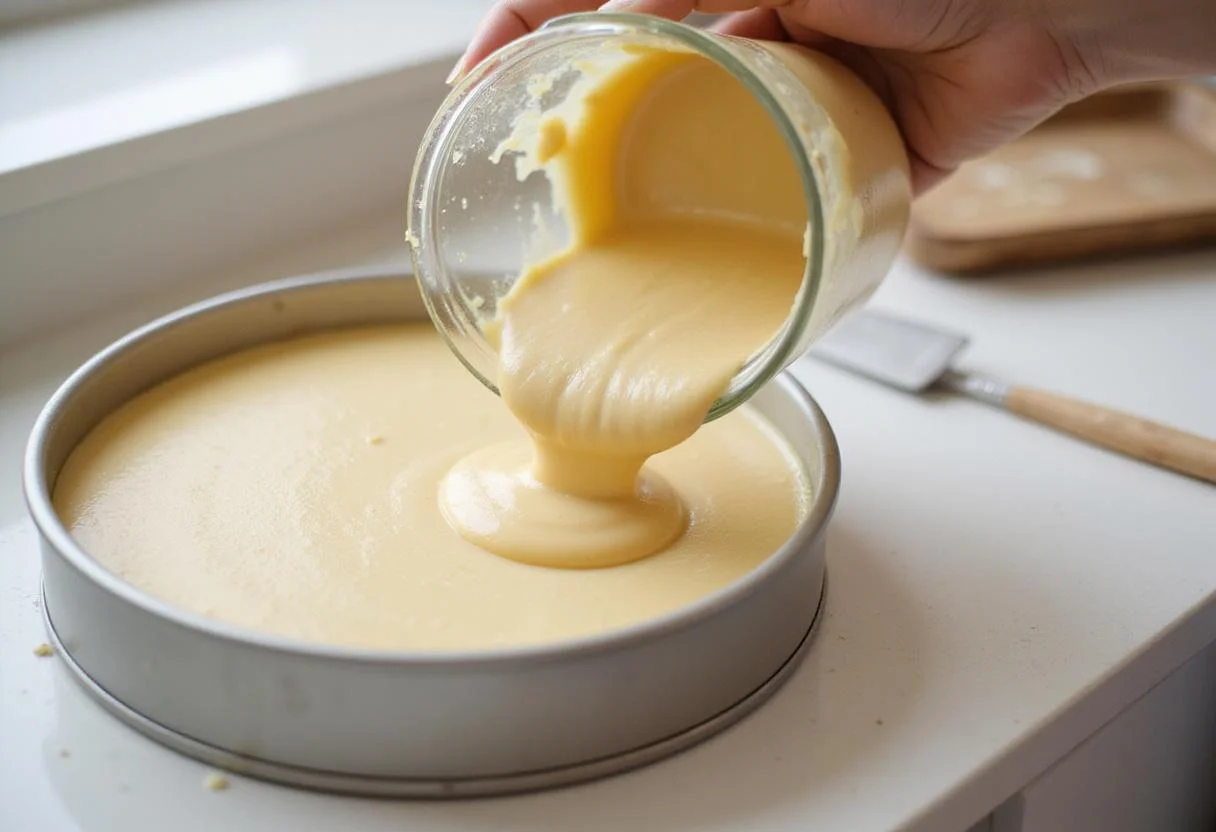
Step 3: Fill the Pan
Carefully pour the cheesecake filling over the prepared crust in the springform pan. Use a spatula to smooth the top for an even finish. Place the pan in the preheated oven and bake for approximately 45-50 minutes, or until the edges are set but the center slightly jiggles. This step is crucial to achieving that perfect texture in your protein cheesecake. Avoid over-baking to prevent the cheesecake from cracking. A water bath can also help maintain a moist and creamy texture. If you love baking, try our nutritious Hawaiian roll delights: Nutritious Hawaiian Roll Delights.
Step 4: Cool and Serve
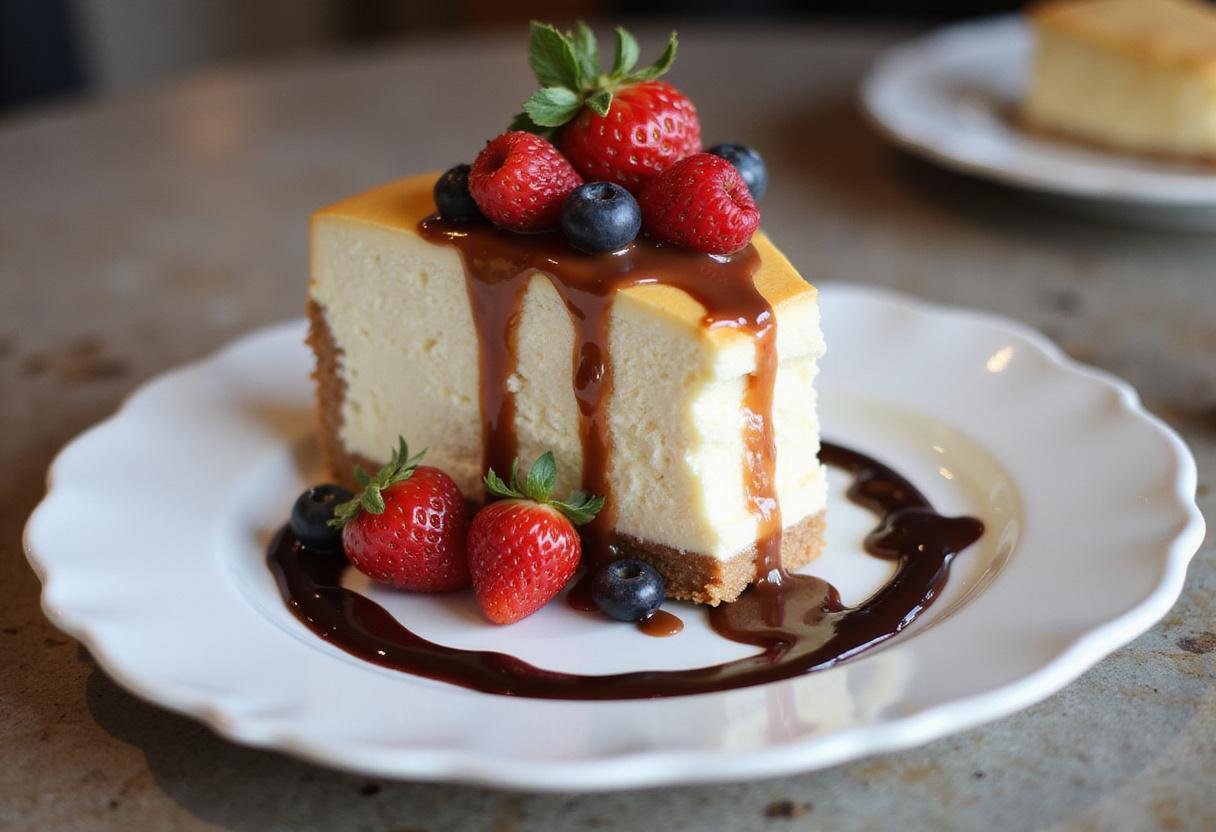
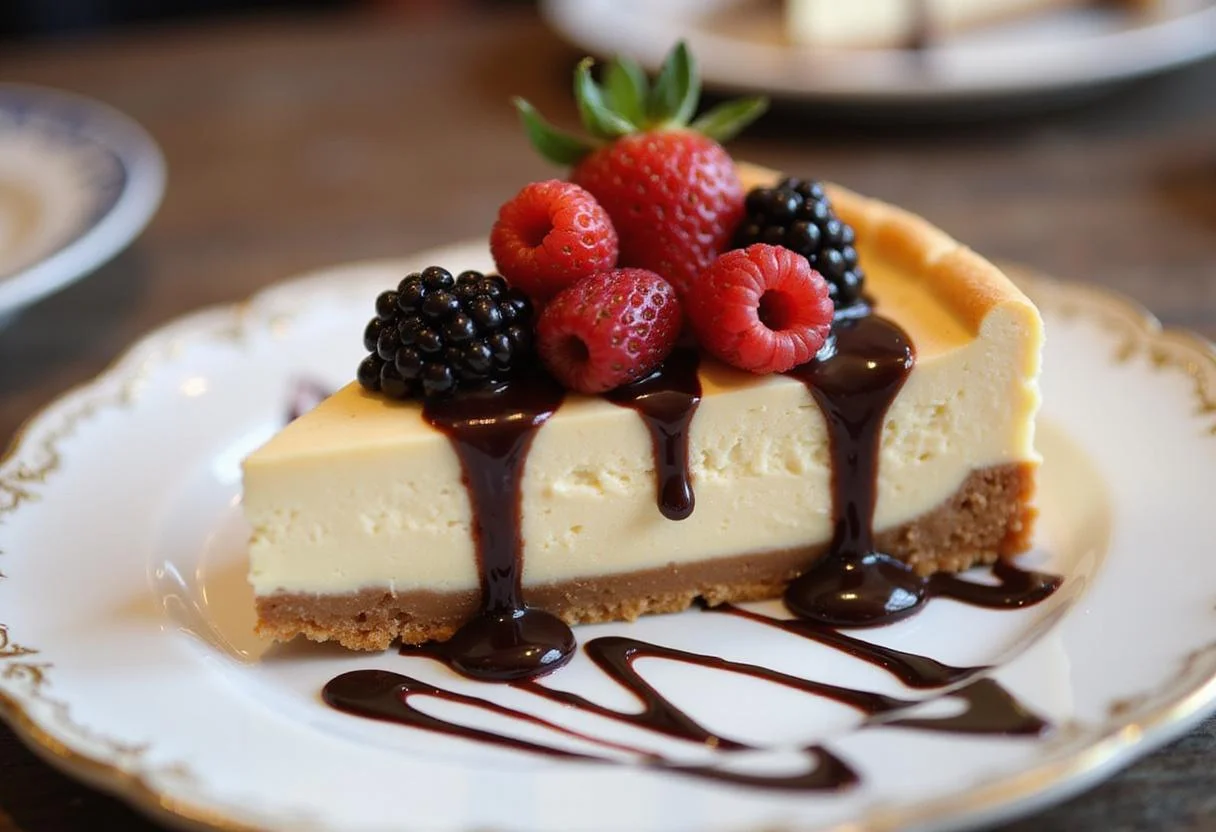
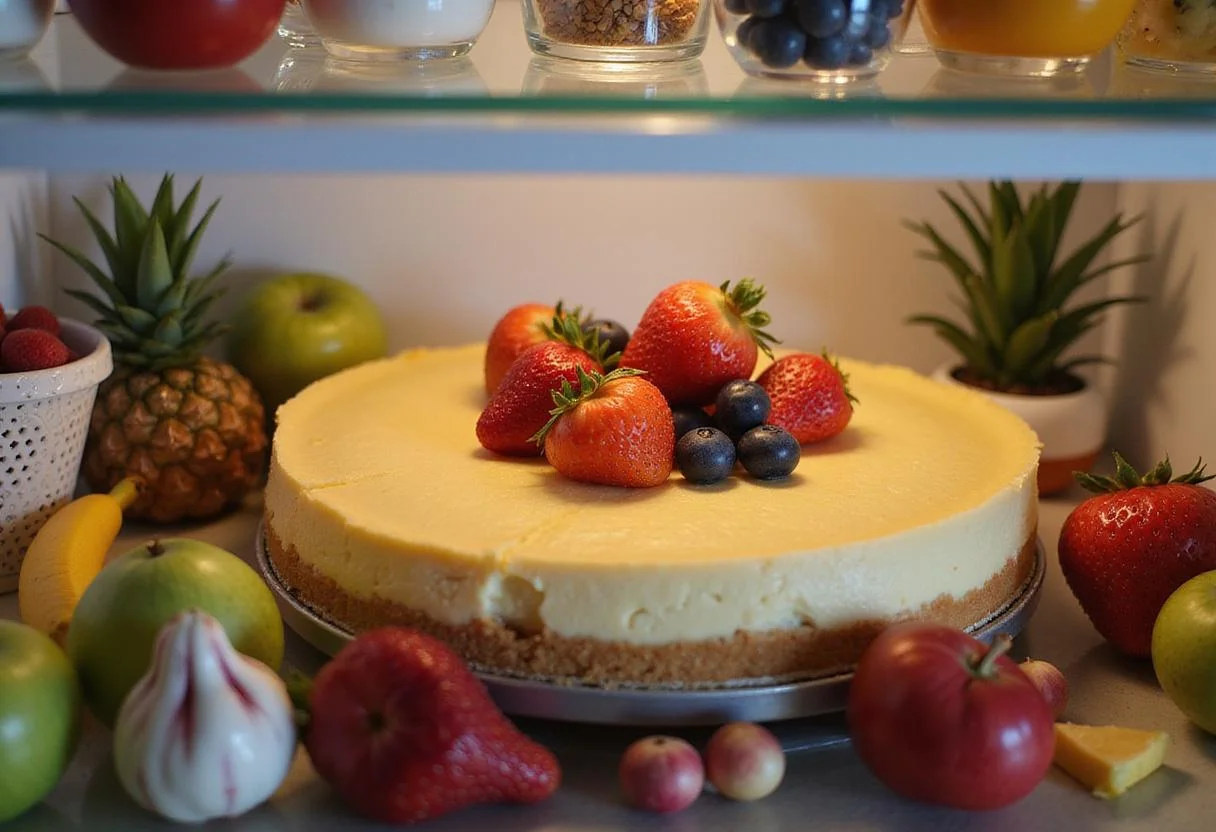
Once baked, turn off the oven and leave the cheesecake inside for an additional hour to cool gradually. Then, transfer the cheesecake to the fridge to chill for at least 4 hours, or overnight for best results. When ready to serve, top with fresh berries for that delightful finishing touch! Enjoy your homemade protein cheesecake as a satisfying and nourishing dessert! Allowing the cheesecake to cool slowly prevents cracking and ensures a smoother texture. The chilling time is essential for the cheesecake to set properly.
4. Storage Tips: Keeping Your Protein Cheesecake Fresh
To keep your protein cheesecake fresh, store it in an airtight container in the fridge. It can last up to a week, making it a great make-ahead dessert for busy days. If you want to keep it longer, you can freeze slices individually for up to three months! Thaw frozen slices in the refrigerator before serving for the best taste and texture. Properly stored, your protein cheesecake will remain a delicious and convenient treat.
Looking for more delicious snack ideas? Explore our category for more: Snack Category.
5. Serving Suggestions: Elevate Your Protein Cheesecake Experience
Enjoy your protein cheesecake as a standalone dessert or pair it with a refreshing fruit salad or a drizzle of dark chocolate sauce for an extra treat. This cheesecake makes an excellent post-workout snack or a satisfying dessert after dinner! Consider adding a dollop of whipped cream or a sprinkle of nuts for added texture and flavor. The serving possibilities are endless, so get creative and enjoy!
You can also learn more about other protein cheesecake recipes here: Protein Cheesecake.
6. FAQs: Your Questions About Protein Cheesecake Answered
What can I use instead of cream cheese in a protein cheesecake?
You can substitute cream cheese with Greek yogurt or a dairy-free alternative like cashew cream to maintain a creamy texture while enhancing protein content! These alternatives can also reduce the overall fat content of your protein cheesecake.
Can I make a crustless protein cheesecake?
Absolutely! Simply skip the crust step and pour the filling directly into your springform pan for a lower-carb version of this delicious protein cheesecake. This option is perfect for those following a ketogenic or low-carb diet. If you love crustless treats, check out our moist delicious zucchini bread: Moist Delicious Zucchini Bread.
How do I know when my protein cheesecake is done?
The edges should be set while the center remains slightly jiggly. It will continue to firm up as it cools in the oven and then in the fridge! Insert a toothpick into the center; it should come out with a few moist crumbs attached, indicating that it’s perfectly baked.
7. Nutritional Benefits: Fueling Your Body with Protein Cheesecake
This protein cheesecake is not just a dessert; it’s packed with protein from the cream cheese and protein powder, promoting muscle recovery and satiety. Additionally, it incorporates healthier sweeteners and yogurt, making it a wholesome crowd-pleaser! The high protein content helps keep you feeling full and satisfied, reducing cravings for unhealthy snacks.
8. Variations: Customize Your Protein Cheesecake
Feel free to experiment with different flavors! Adding cocoa powder can create a chocolate version, or incorporate lemon zest for a citrusy twist. Consider adding a swirl of peanut butter or a layer of fruit compote for added flavor and texture. If you’re feeling adventurous, try adding some zesty tangy chili lime treat to your recipe: Chili Lime Treat. The possibilities are endless with your protein cheesecake!
9. Conclusion: Savor the Goodness of Homemade Protein Cheesecake
In conclusion, this protein cheesecake offers a delectable way to enjoy dessert without compromising health. Easy to prepare and customizable to your taste, it’s sure to become a favorite in your household. Grab your ingredients and start baking this delightful treat today! Enjoy the satisfaction of knowing you’re indulging in a dessert that’s both delicious and beneficial for your body. Happy baking!
Print
Protein Cheesecake
Indulge in a Healthy Delight with this Protein Cheesecake! This delicious dessert is the perfect blend of indulgence and nutrition, loaded with protein to satisfy your sweet tooth guilt-free. Ideal for post-workout or as a delicious treat, this cheesecake combines creamy texture with mouthwatering flavor!
- Total Time: 4 hours 70 minutes
- Yield: 12 servings 1x
Ingredients
- 1 ½ cups crushed graham crackers
- ½ cup unsalted butter, melted
- 16 oz cream cheese, softened
- 1 cup protein powder (vanilla or your choice)
- ½ cup Greek yogurt
- ½ cup honey or maple syrup
- 3 large eggs
- 1 tsp vanilla extract
- Fresh berries for topping
Instructions
- Preheat your oven to 350°F (175°C). Combine crushed graham crackers and melted butter in a mixing bowl, then press into the bottom of a springform pan.
- In a large mixing bowl, blend softened cream cheese and protein powder until smooth. Gradually add Greek yogurt, honey (or maple syrup), eggs, and vanilla extract, blending until creamy.
- Pour the cheesecake filling over the crust in the springform pan and smooth the top. Bake for 45-50 minutes, or until the edges are set and the center slightly jiggles.
- Turn off the oven and let the cheesecake cool inside for an hour. Transfer it to the fridge to chill for at least 4 hours before serving. Top with fresh berries before serving.
Notes
- Store leftovers in an airtight container in the fridge for up to a week.
- Freeze slices individually for up to three months for longer storage.
- Try variations with cocoa powder or lemon zest to change up the flavors!
- Prep Time: 20 minutes
- Cook Time: 50 minutes
- Category: Dessert
- Method: Baking
- Cuisine: American
- Diet: High-Protein
Nutrition
- Serving Size: 1 slice
- Calories: 200 Kcal
- Sugar: 10g
- Sodium: 150mg
- Fat: 10g
- Saturated Fat: 5g
- Unsaturated Fat: 3g
- Trans Fat: 0g
- Carbohydrates: 20g
- Fiber: 1g
- Protein: 14g
- Cholesterol: 60mg