
🍫✨ No-Bake Chocolate Raspberry Truffles: A Decadent, Effortless Holiday Dessert!
1. Introduction
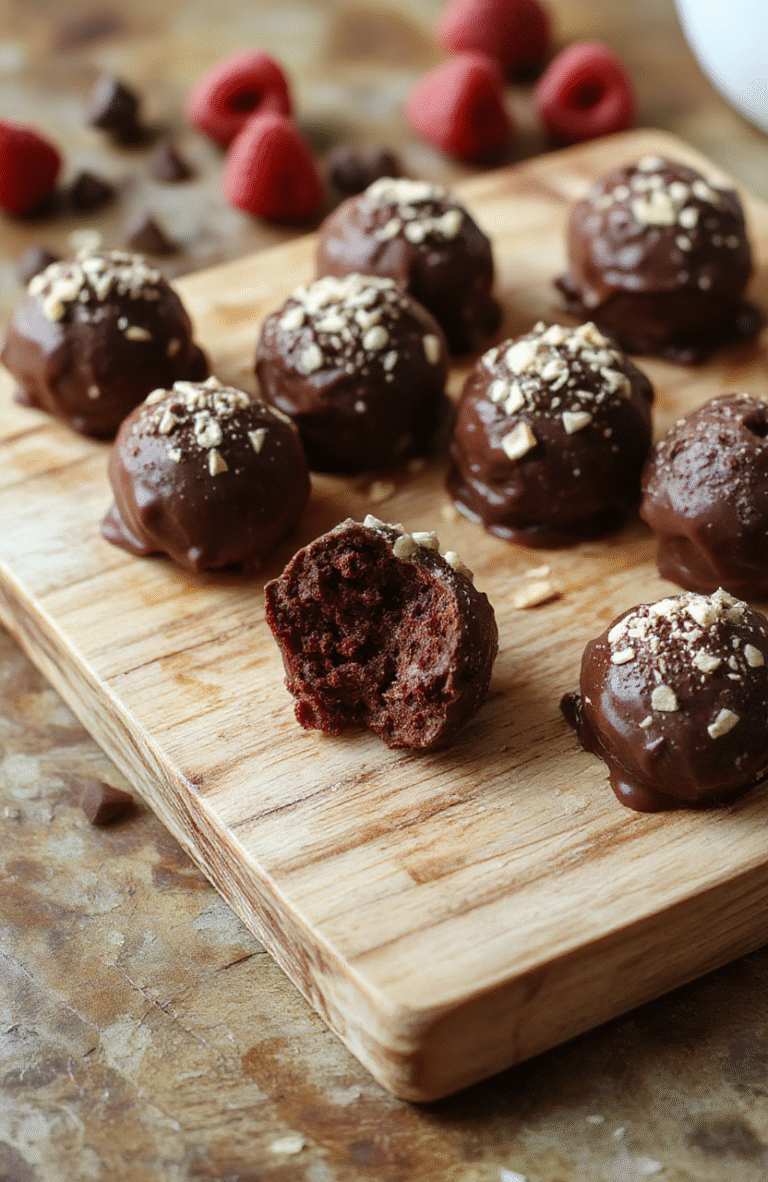
There’s something magical about no-bake chocolate raspberry truffles—rich, velvety dark chocolate blanketing a tangy, fruity raspberry center, all dusted in a delicate cocoa powdery finish. These no-bake chocolate raspberry truffles are the ultimate quick frozen treats for last-minute guests, last-minute gifting, or a spontaneous sweet treat during the holiday rush. Why waste time at the oven when you can have creamy, dreamy truffles ready in under 30 minutes—and freeze for up to 2 weeks? I’ve tested this recipe three times this winter alone (yes, really!) to perfect the balance of sweetness and tartness, ensuring every bite delivers that beautiful contrast we all crave.
2. Why You’ll Love This Recipe
- ⏱️ Ready in 25 minutes (plus freezing time)—perfect for impromptu dessert plans or last-minute holiday gift prep.
- :no_bake_sign: No oven required—ideal for hot summer days or when your kitchen already feels like a sauna.
- 🎁 Great for gifting—layer them in a festive tin or box for homemade Christmas or Valentine’s Day gifts.
- 🧠 Simple ingredients—only 6 pantry-friendly staples plus 1 optional but highly recommended add-in.
- 🔥 Customizable intensity—adjust the raspberry extract, cocoa level, or even swap in white chocolate for a twist.
3. Ingredient Notes
Let’s talk ingredients—not just what to use, but why it matters. These little details are what turn a decent truffle into a show-stopper.
High-Quality Dark Chocolate (70% cacao): Don’t use chocolate chips here—they contain stabilizers that prevent smooth melting. Opt for chopped couverture or a premium baking bar like Ghirardelli or Guittard. The higher fat content = silkier texture.
Raspberry Extract (NOT oil): Extract gives bright, clean raspberry flavor without adding extra moisture that could ruin the truffle’s structure. Avoid artificial “flavorings”—go for pure, alcohol-based raspberry extract (I love the Nielsen-Massey brand).
Heavy Cream (not light or half-and-half): Fat is your friend. Full-fat cream whips up richer and sets firmer, helping the centers hold shape when rolled.
Cocoa Powder (Dutch-process preferred): For dusting and optional cocoa swirls in the mixture. Dutch-process has a deeper, less acidic flavor than natural cocoa—and it blends more smoothly into ganache.
Optional but Game-Changing: Freeze-Dried Raspberry Powder: Blend 2 tbsp freeze-dried raspberries into a fine powder. It adds intense fruitiness *and* color—vibrant raspberry red in the center without any liquid. (I get mine at the local grocer or on Amazon.)
4. Kitchen Tools You Need
You don’t need fancy equipment—but the right tools *do* make the process lighter, faster, and more precise. Here’s what I reach for for every batch:
For small-batch chocolate work, the Compact 6-in-1 Digital Air Fryer by Amazon Basics doubles as a gentle melter if you don’t have a double boiler—just place a heatproof bowl inside and use the “dehydrate” setting (low heat) to melt chocolate slowly without scorching.
The KitchenAid Artisan 5-Quart Stand Mixer in Scorched Orange is magical for whipping cream quickly to firm peaks without over-whipping. I still use mine for holiday meringues, too!
For clean, consistent truffle rolling, the Deluxe 33-Piece Silicone Utensil Set is invaluable—silicone scrapers get every last drop of ganache from the bowl, and the mini spatulas are perfect for portioning.
And if you love festive gifting, the JoyJolt Airtight Glass Food Storage Set makes beautiful, reusable truffle containers—stackable and microwave-safe for easy reheating (though, let’s be honest—they’ll be gone before that’s necessary).
5. How to Make No-Bake Chocolate Raspberry Truffles
Phase 1: Make the Ganache Base (0–10 minutes)
Chop 8 oz of dark chocolate finely and place in a heatproof bowl. In a small saucepan, heat 1/2 cup heavy cream over medium heat until small bubbles form around the edges (just shy of boiling). Pour over the chocolate, add 1/2 tsp pure raspberry extract, and let sit for 2 minutes. Stir gently with a silicone spatula until smooth and glossy—no streaks should remain. If you’re using freeze-dried raspberry powder, whisk 2 tbsp in now for a stunning swirl effect.
Phase 2: Chill & Set (20–30 minutes)
Cover the bowl tightly with plastic wrap, pressing the wrap directly onto the surface of the ganache to prevent a skin from forming. Refrigerate for at least 20 minutes (or freeze for 10–12 minutes if you’re pressed for time). The ganache is ready when it holds a soft-pea-soup texture—not hard, but cool enough to hold its shape when scooped.
Phase 3: Roll & Coat (10 minutes)
Scoop 1-tbsp portions with a cookie scoop (or spoon) and quickly roll between your palms into smooth balls. If the ganache gets too soft, pop the bowl back in the fridge for 3 minutes—warm hands are the enemy of perfect truffles! Once all are shaped, roll each truffle in sifted cocoa powder, powdered sugar, or crushed freeze-dried raspberries. For ultra-sophisticated looks, dust with edible gold powder using a soft pastry brush.
Phase 4: Set & Store
Place finished truffles on a parchment-lined tray and freeze for 15 minutes to firm up—this makes them easier to package and prevents sticking. Transfer to an airtight container, layering with parchment paper, and store in the fridge (up to 2 weeks) or freeze (up to 3 months).
6. Expert Tips for Success
Based on countless batches, here are the pro tricks I wish someone told me when I started:
- Keep hands cool: Dip fingers in cold water before rolling, or wear food-safe gloves. Warm hands = melted truffles.
- The 2-minute rest is non-negotiable: Pouring hot cream *too quickly* over chocolate can cause seizing. Let it sit to start the emulsification process.
- Freeze-dried raspberries > fresh: Juice from fresh fruit adds water, which breaks ganache. Powder keeps the center rich and stable.
- Don’t skip the sift: Sift cocoa powder and raspberry powder to avoid lumps and ensure velvety texture.
- Double batch = smarter:制作 the full recipe and freeze half in labeled portions—pull one batch out the night before you need it.
7. Variations & Substitutions
For a Dairy-Free Version: Swap heavy cream for full-fat canned coconut milk (chilled overnight), and use vegan dark chocolate. Add 1/4 tsp lecithin to help emulsify.
For Mint-Lover’s Truffles: Replace raspberry extract with peppermint extract (start with 1/4 tsp and adjust), and use dark chocolate with a hint of sea salt. Roll in crushed candy canes.
For Nutty Crunch: Fold in 3 tbsp chopped toasted almonds, pistachios, or hazelnuts into the chilled ganache before rolling.
For White Chocolate Raspberry Truffles: Use 8 oz white chocolate, reduce cream to 1/3 cup, and increase raspberry extract to 3/4 tsp. Roll in freeze-dried raspberry powder for contrast.
8. Storage & Reheating
Fridge: Store in a sealed container for up to 14 days. Let come to room temperature for 10 minutes before serving for maximum creaminess.
Freezer: Place truffles in a single layer in a freezer-safe container. Freeze up to 3 months. Thaw in the fridge for 1 hour or at room temp for 15 minutes.
Reviving Slightly Softened Truffles: If they soften unexpectedly, chill for 10 minutes and re-roll in fresh cocoa or powdered sugar.
9. FAQ
Q: My ganache separated! What went wrong?
A: Usually due to overheating the cream or adding it too fast to the chocolate. If it’s still smooth after stirring, you’re fine. If curdled, blend with an immersion blender or Foodi—yes, the Ninja Foodi Smart XL Indoor Grill & Air Fryer Combo works great as a high-speed blender!
Q: Can I make these kids-friendly?
A: Easily! Omit extract, add 1/4 tsp vanilla, and use semi-sweet chocolate. Roll in chocolate sprinkles or crushed cookies instead of cocoa.
Q: Why use ganache instead of fudge?
A: Ganache sets firm but creamy. Fudge-based centers can be overly sweet, crumbly, or require candy thermometers. This method is simpler and more forgiving.
Q: Are these gluten-free?
A: Yes—if you use pure, certified gluten-free chocolate and ensure your extract is certified GF (most are, but always check).
10. Conclusion
There you have it—my foolproof, crowd-pleasing no-bake chocolate raspberry truffles, perfected for speed, elegance, and pure indulgence. Whether you’re making them as edible holiday gifts, a last-minute dessert for guests, or just treating yourself after a long workday, these truffles deliver big flavor with zero stress. And if you’re loving this easy holiday dessert idea, don’t miss my Ultimate Moist Chocolate Banana Bread or my Sweet & Spicy Honey Pepper Chicken for a full festive spread.
Happy truffle-making—and remember: life is too short for boring desserts. 🫐💋 Print
No-Bake Chocolate Raspberry Truffles
These no-bake chocolate raspberry truffles combine rich dark chocolate with bright raspberry flavor for a decadent yet effortless holiday dessert. No oven required!
- Total Time: 2 hours 30 minutes
- Yield: 24 truffles 1x
Ingredients
- 12 oz (340g) high-quality dark chocolate, chopped
- 1/2 cup (115g) unsalted butter, softened
- 1/2 cup (120ml) heavy cream
- 1/4 cup (70g) raspberry preserves
- 2 tbsp cocoa powder, for coating
- 1/2 cup (60g) powdered sugar
- Fresh raspberries and edible gold flakes, for garnish (optional)
Instructions
- Line a baking sheet with parchment paper.
- In a heatproof bowl over simmering water (double boiler), melt chocolate and butter together, stirring until smooth. Remove from heat.
- In a small saucepan, heat heavy cream until just simmering; pour over chocolate mixture. Stir until emulsified. <li id="instruction-step-4" stir in powdered sugar and raspberry preserves until fully incorporated.
- Cool mixture at room temperature for 15 minutes, then cover and chill for at least 2 hours, or until firm enough to roll.
- Using a melon baller or spoon, scoop chilled mixture and roll into 1-inch balls.
- Roll each truffle in cocoa powder, then garnish with a fresh raspberry half and a tiny gold flake, if desired.
- Store in an airtight container in the fridge for up to 1 week, or freeze for up to 1 month.
Notes
- For a dairy-free version, use coconut cream and dairy-free chocolate.
- For stronger raspberry flavor, swirl in 1–2 tbsp freeze-dried raspberry powder.
- To gift: Layer in a cute box with parchment between layers; add ribbon for a festive touch.
- Prep Time: 20 minutes
- Cook Time: 10 minutes
- Method: No-Bake
- Cuisine: American
- Diet: Vegetarian
Nutrition
- Serving Size: 1 truffle
- Calories: 72 Kcal
- Sugar: 5g
- Sodium: 15mg
- Fat: 6g
- Saturated Fat: 4g
- Unsaturated Fat: 2g
- Trans Fat: 0g
- Carbohydrates: 4g
- Fiber: 1g
- Protein: 1g
- Cholesterol: 12mg