🍯 Honey Butter Chicken with Garlic Rice: A Golden, Juicy Weeknight Miracle 🍚
1. Introduction
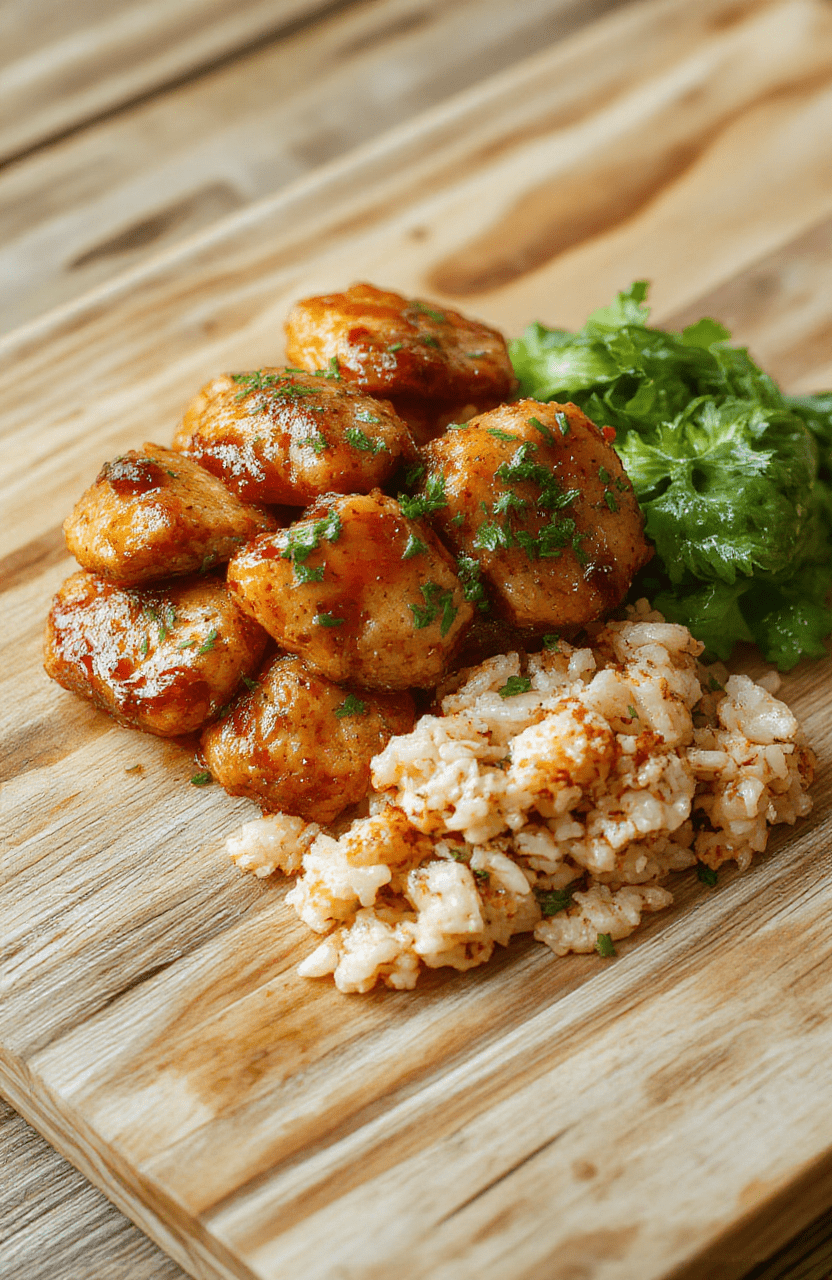
When dinner needs to feel like a warm hug but time is tight, this honey butter chicken delivers every single time. Tender chicken thighs are seared to caramelized perfection, then swaddled in a glossy, rich sauce made from honey, butter, garlic, and a hint of soy—until it clings to every bite like liquid gold. Paired with fragrant garlic rice that soaks up every drop of that silky glaze, this meal is the ultimate quick weeknight chicken dinner that somehow feels restaurant-worthy. We’ve tested it endlessly—from high-heat pan-searing to oven-finishing—so your family gets consistent results without the stress. If you’re craving comfort with zero compromise, this easy one-pan chicken recipe belongs in your rotation STAT.
2. Why You’ll Love This Recipe
- Ready in under 30 minutes—perfect for even the most chaotic weeknight.
- One-pan meal (plus rice pot)—minimize cleanup and maximize flavor harmony.
- Sweet-savory balance that pleases kids *and* adults (no picky eater left behind!).
- Finger-licking glaze that coats the chicken and soaks into the rice like a flavor bomb.
- Versatile base—pairs beautifully with steamed veggies, roasted broccoli, or a simple green salad.
3. Ingredient Notes
The magic here is in the *quality*—not complexity. Let’s talk why we chose each element:
- Chicken thighs (boneless, skin-on): They’re forgiving, stay juicy even if you overcook by a minute, and the skin crisps beautifully—giving texture and extra flavor. Bonus: dark meat absorbs the honey butter glaze beautifully.
- Unsalted butter: Lets you control salt levels and ensures a clean, rich mouthfeel. Go for European-style if you can (higher fat = creamier sauce).
- Raw honey: Not only does it caramelize more deeply than processed honey, but its floral notes add complexity. A drizzle at the *end* (off heat) preserves delicate aromatics.
- Garlic**: We use *4–5 whole cloves*, smashed but not minced. Why? Smashed garlic infuses the oil gently without burning—no bitter, acrid notes. Then, at the end, we stir in minced garlic for that bright, fresh pop.
- Low-sodium soy sauce (or tamari for GF): Balances the sweetness and adds umami depth. Regular soy sauce can easily overpower—go light!
- Chicken broth (preferably low-sodium)**: Adds body to the sauce and prevents it from reducing too quickly or becoming syrupy.
- Long-grain white rice (Jasmine or Basmati): Their fluffy texture and mild nuttiness pair perfectly with the sticky-savory chicken. For extra flair, toast the uncooked rice in butter before adding broth—this enhances nuttiness and prevents clumping.
4. Kitchen Tools You Need
You *can* make this with what you already own—but having the right tools makes the process smoother, faster, and more consistent. Here’s what we swear by:
- Heavy-bottomed skillet (like the T-fal 14-Piece Hard Anodized Nonstick Cookware Set) 🔗 Check it out here: Its even heat distribution prevents hot spots that burn garlic and ensure perfectly seared chicken every time. The nonstick surface also helps easily deglaze for that glossier glaze.
- Sharp chef’s knife + microplane: Mincing garlic finely (or grating it) ensures even distribution in the sauce—but don’t overdo it or it’ll turn bitter.
- Wooden spoon & silicone spatula: Stirring the sauce without scratching your pan—bonus points for the Deluxe 33-Piece Silicone Utensil Set 🔗 available here with color-coded handles for organization.
- Small saucepan for garlic rice: You want tight control of broth-to-rice ratios—prevents mushy or crunchy disasters.
- Instant-read thermometer: For foolproof chicken doneness (165°F at the thickest part). Skip the guesswork!
Tip: If you’re short on time and counterspace, consider the Ninja Air Fryer Pro Crisp & Roast 4-in-1 🔗 for faster, crispier chicken—just air fry thighs at 400°F for 12–14 mins, then glaze and broil in the oven or pan for 2 minutes. It *does* reduce oil absorption and speeds up the weeknight crunch factor!
5. How to Make Honey Butter Chicken with Garlic Rice
Phase 1: Prep & Par-Cook the Rice
Rinse 1 cup long-grain rice until water runs clear (prevents stickiness). In a small saucepan, melt 1 tbsp butter, add 1½ cups chicken broth, and 1 minced garlic clove. Stir in rice, bring to a boil, cover, reduce to low, and simmer for 15 minutes. Turn off heat and let it steam, covered, for 5 more minutes. Fluff with a fork and set aside covered.
Phase 2: Sear the Chicken Like a Pro
Pat chicken thighs *very dry*—this is non-negotiable for browning. Season generously with salt and pepper. Heat 1 tbsp oil (or use leftover drippings from skin) in a large skillet over medium-high heat. Place chicken skin-side down and don’t touch it for 6–7 minutes. Listen for that steady sizzle—look for deep golden-brown, almost crispy skin. Flip and cook 4–5 minutes more. Transfer chicken to a plate (don’t wipe the pan—we need those flavor-packed bits!).
Phase 3: Build the Glaze—With Visual Cues
Reduce heat to medium. Add 2 tbsp butter, 3 smashed garlic cloves, and sauté 30 seconds until fragrant (not browned!). Pour in ¼ cup soy sauce, 3 tbsp honey, and ¼ cup chicken broth. Stir *vigorously* with a wooden spoon, scraping up the browned bits from the chicken—this is where flavor lives. Let it bubble for 2 minutes until slightly thickened (like warm maple syrup).
Phase 4: Glaze & Finish
Return chicken (and any juices) to the pan, skin-side up. Spoon the sauce over generously. Add 1 tbsp cold butter off the heat—this “mounts” the sauce, giving it that glossy, restaurant-style sheen. Let rest 3–5 minutes (crucial! Juices reabsorb).
Phase 5: Assemble & Serve
Fluff garlic rice with remaining minced garlic and a pat of butter. Plate rice, top with chicken, and drizzle with pan sauce. Garnish with sesame seeds and sliced scallions.
6. Expert Tips for Success
- Dry chicken = crispy skin. Pat with paper towels *twice*—moisture is the enemy of browning.
- Don’t crowd the pan. Cook in batches if needed. Overcrowding steam-fries instead of searing.
- Smash, don’t mince, the first garlic batch. It creates a milder, deeper base flavor without burning.
- Add cold butter off-heat. If added while simmering, it can break the emulsion and make the sauce oily.
- Rest the chicken. Skipping this = dry meat. Ten seconds of patience makes all the difference.
7. Variations & Substitutions
- Spicy version: Add ½ tsp red pepper flakes with the garlic or a splash of sriracha to the glaze.
- Sweetener swap: Use pure maple syrup or brown sugar for a toasty,molasses depth.
- Gluten-free: Use tamari (e.g., San-J) instead of soy sauce.
- Vegetarian option: Swap chicken for pressed tofu or tempeh—Marinate and air fry until crisp, then glaze similarly.
- Low-carb version: Serve over cauliflower rice (sauté with garlic and butter first).
8. Storage & Reheating
Store chicken and rice separately in airtight containers (we love the JoyJolt Airtight Glass Food Storage Set 🔗 here) for up to 4 days.
Reheat instructions:
- Stovetop (best for texture): Warm chicken in a skillet over medium-low, adding a splash of broth to keep it moist. Reheat rice separately.
- Micro: Cover with a damp paper towel to prevent drying—heat rice 1–2 mins, chicken 1 min. Stir halfway.
Cooking for meal prep? Double the batch and freeze half (without rice) for up to 3 months. Thaw overnight in the fridge.
9. FAQ
Can I use chicken breast instead of thighs?
Yes—but you *must* monitor internal temp closely. Breast hits 160°F (it’ll continue cooking carryover heat), then rest 5 minutes. For best results, Pound to even thickness andConsider brining in salt water (1 tbsp salt + 1 cup water) for 20 mins before cooking to boost juiciness.
My sauce was too sweet—how do I balance it?
Add acid: a squeeze of fresh lemon juice or a splash of apple cider vinegar brightens and cuts richness. Also, try using raw honey *only* for the final dressing—swap the cooking honey for maple syrup, which is less sweet.
Why does my garlic burn so easily?
Garlic burns at 250°F—lower than oil’s smoke point. Always add it *after* oil heats (but before chicken goes in) and stir constantly. Or use the double garlic method: smashed (for depth), then raw minced (for brightness) added off-heat.
Can I make this in the oven instead of stovetop?
Absolutely! Sear thighs in a 12″ oven-safe skillet, then transfer skillet to a 400°F oven for 12 minutes. While roasting, make the glaze on the stovetop, then spoon over chicken. Return to oven for 3 minutes. Broil 1–2 more for color.
10. Conclusion
This honey butter chicken isn’t just dinner—it’s comfort, speed, and flavor all in one tidy package. Its glossy, rich sauce clings to tender chicken and soaks into garlicky rice, making every bite feel like a celebration. Whether you’re feeding a picky crew or impressing a date, this easy one-pan chicken recipe delivers. Pair it with our Sweet & Spicy Honey Pepper Chicken for a flavor-filled week or try the Dump-and-Go Smothered Pork Chops for another one-pan winner.
Got leftovers? Freeze them. Have a craving? Make it tonight. This honey butter chicken? It’s your new go-to.
Print
Honey Butter Chicken with Garlic Rice
Juicy chicken breasts cooked in a sweet and savory honey garlic butter sauce — a quick, one-pan weeknight wonder.
- Total Time: 25 minutes
- Yield: 4 servings 1x
Ingredients
- 2 boneless, skinless chicken breasts (about 1 lb)
- 1 tbsp olive oil
- 2 tbsp unsalted butter
- 3 cloves garlic, minced
- 3 tbsp honey
- 1 tbsp soy sauce (or tamari for gluten-free)
- 1 tsp lemon juice
- ½ tsp dried thyme
- Salt and pepper to taste
- Fresh parsley, chopped (for garnish)
- 1 cup cooked white rice (for serving)
- 1 cup steamed broccoli florets (optional, for garnish)
Instructions
- Season chicken breasts with salt and pepper.
- Heat olive oil in a large skillet over medium-high heat. Sear chicken 5–6 mins per side until golden and cooked through (internal temp 165°F). Remove and set aside.
- Reduce heat to medium. Add butter, garlic, honey, soy sauce, lemon juice, and thyme. Simmer 2 mins, whisking until smooth.
- Return chicken to skillet, spooning sauce over top. Let sit 1–2 mins to absorb flavor.
- Slice chicken and serve over rice, garnished with parsley and broccoli.
Notes
- For extra caramelization, sear chicken at high heat without moving for 3 mins per side.
- Double the sauce for extra sauciness — add a splash of chicken broth if too thick.
- Swap rice for quinoa or mashed potatoes based on preference.
- Prep Time: 10 minutes
- Cook Time: 15 minutes
- Method: Pan-sear and simmer
- Cuisine: American
- Diet: None specified
Nutrition
- Serving Size: 1 chicken breast + ¼ cup rice + sauce
- Calories: 380 Kcal
- Sugar: 16g
- Sodium: 420mg
- Fat: 14g
- Saturated Fat: 6g
- Unsaturated Fat: 7g
- Trans Fat: 0g
- Carbohydrates: 34g
- Fiber: 1g
- Protein: 32g
- Cholesterol: 85mg