🍗 Crispy Homemade Chicken Tenders That Tastes Like Your Favorite Copycat Chain — But Finer 🍗
1. Introduction
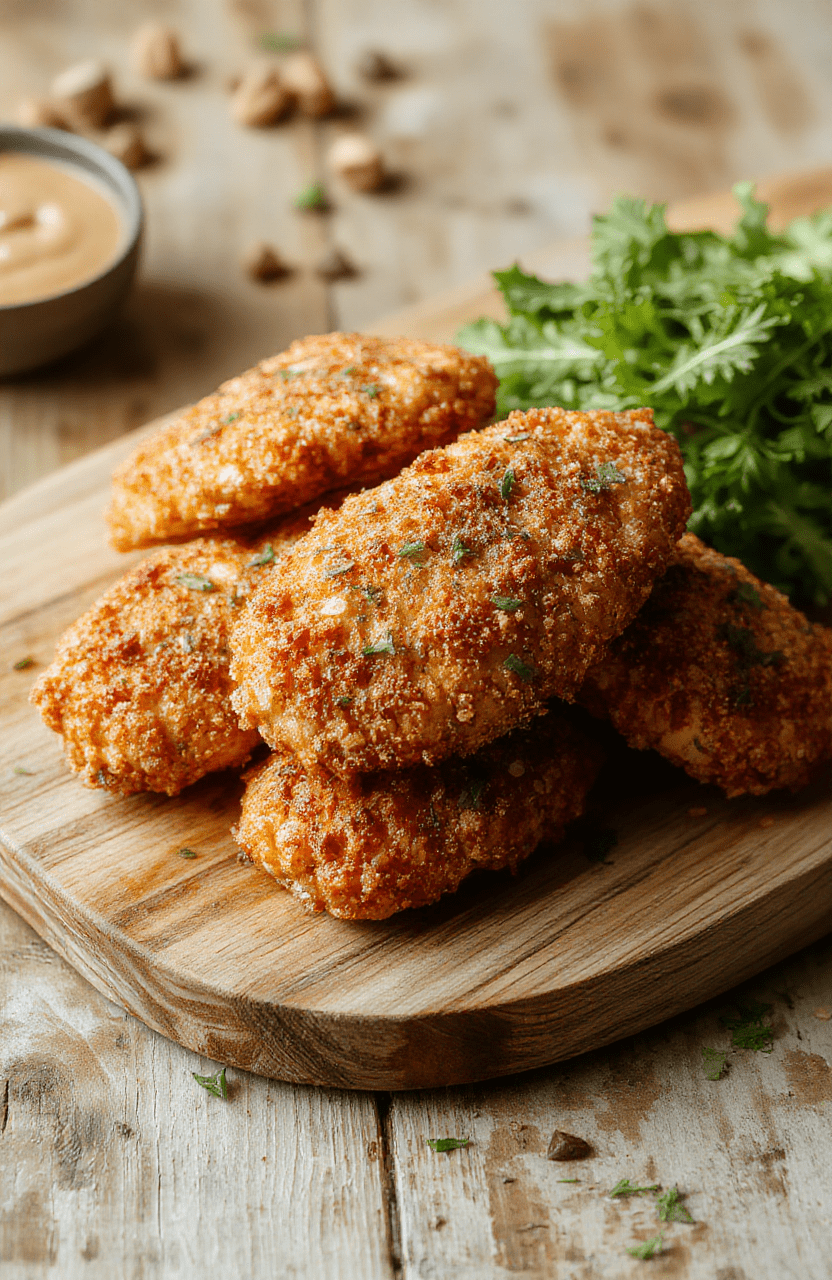
There’s something *unapologetically satisfying* about biting into a golden-brown, crispy homemade chicken tender — the kind where the crust shatters audibly, giving way to tender, juice-rich meat inside. This recipe delivers that homemade chicken tenders magic without compromise, rivaling well-known fast-food chains while letting you control every element: texture, seasoning, and even oil usage. Inspired by a beloved Crispy Chick-Fil-A copycat style, but perfected with a double-dredge technique andButter-Infused Fry Oil, this easy chicken tenders dinner comes together in under 30 minutes and uses pantry staples you likely already own.
2. Why You’ll Love This Recipe
- Ready in 20–25 minutes — far quicker than many takeout options, and healthier to boot.
- One-pot or one-tray prep — minimize cleanup with either pan-frying or air frying.
- Gluten-free & dairy-free adaptable — swap flour for almond flour, buttermilk for coconut milk + lemon juice.
- Freezer-friendly — prep ahead and cook from frozen (add 3–4 minutes to cook time).
- Perfect for meal prep — pairs beautifully with our Sweet & Spicy Honey Pepper Chicken or Buffalo Chicken Sliders for variety.
3. Ingredient Notes
Quality makes all the difference here — especially with such few ingredients. Let me break down why each one matters:
- Chicken breast tenders (or cut yourself) — look for organic, antibiotic-free chicken when possible. If buying whole breasts, slice them into 1–1.5-inch strips for uniform frying.
- Buttermilk — not optional. It tenderizes the meat and helps the coating adhere. No buttermilk? Make a substitute: add 1 tbsp lemon juice or vinegar to 1 cup milk and let sit 5 minutes.
- All-purpose flour + cornstarch — this combo creates superior crispiness. Cornstarch browns faster and yields that ultra-crisp crunch.
- Seasonings — a balance of paprika ( smoked or sweet), garlic powder, onion powder, and a pinch of cayenne for warmth. Avoid pre-mixed seasoning blends with anti-caking agents — they sometimes leave a bitter aftertaste.
- Canola or peanut oil — high smoke point and neutral flavor. For richer flavor, try clarified butter (ghee) — it browns faster and gives a luxurious finish.
4. Kitchen Tools You Need
While you *can* use a classic skillet, modern tools make consistency effortless — and safer. Here’s what we recommend:
For air-frying (a healthier, mess-free option): The Compact 6-in-1 Digital Air Fryer by Amazon Basics is surprisingly powerful for small batches and features even airflow for uniform crispness.
For deep-frying or pan-searing: The T-fal 14-Piece Hard Anodized Nonstick Cookware Set includes a perfect-sized frying pan for this recipe — heat-resistant, dishwasher-safe, and scratch-resistant.
Want more versatility? The Ninja Foodi Smart XL Indoor Grill & Air Fryer Combo gives you grill marks + air fry crispiness in one appliance — ideal for周末 meal prep.
Need precise temperature control? A deep-dish cast iron skillet (or the Ninja Air Fryer Pro Crisp & Roast 4-in-1) with FDA-approved nonstick ensures no sticking and easy cleanup.
5. How to Make Homemade Chicken Tenders
Yield: 4 servings
Prep time: 15 minutes
Cook time: 10–12 minutes
Phase 1: Prep & Marinate
Start by preparing the chicken. If using whole chicken breasts, slice each into 4–6 tenders ( About 1–1.5 inches wide). Place them in a bowl and pour 1 cup buttermilk over them — ensure all pieces are fully submerged. Cover and refrigerate for at least 15 minutes (or up to 2 hours for maximum tenderness).
Phase 2: Double-Dredge for Extra Crispness
In a shallow dish, combine:
- ½ cup all-purpose flour
- ¼ cup cornstarch
- 1 tsp paprika
- 1 tsp garlic powder
- 1 tsp onion powder
- ½ tsp black pepper
- ½ tsp salt (adjust to taste)
- ¼ tsp cayenne (optional)
Remove chicken from buttermilk — let excess drip off, do not shake vigorously. Coat one piece at a time in the flour mixture, pressing firmly with your fingers to adhere. For double-dredge (the secret to insane crispiness), dip again into buttermilk, then into the flour mix — pressing a second time. Let rest for 2–3 minutes before cooking.
Phase 3: Cooking — Pan-Fry or Air Fry?
Pan-Fry Option (Classic Crisp):
Heat ¼ inch of oil in a large skillet over medium-high heat to 350°F. Test with a pinch of flour — if it sizzles instantly, you’re ready. Cook tenders in batches (don’t overcrowd!) for 3–4 minutes per side until golden brown and internal temp reaches 165°F.
Air Fryer Option (Lighter, Less Mess):
Preheat air fryer to 400°F. Place tenders in a single layer (use parchment for easier cleanup). Lightly spray with avocado oil. Cook for 8–10 minutes, flipping halfway, until golden and crisp.
Drain on a wire rack (not paper towels!) — this keeps the bottom crust from getting soggy.
6. Expert Tips for Success
- Cold chicken = better adhesion. Take chicken out of fridge 10 minutes before dredging — not while still icy cold.
- Temperature matters. Use a thermometer. Too hot? The coating burns before the chicken cooks through. Too low? You get greasy, dense tenders.
- Double-dredge is non-negotiable. It creates multiple layers of crunch that stay crisp longer.
- Salt in two stages — once in the flour, once after cooking — for balanced seasoning.
- Use a wire rack, not paper towels. Airflow prevents steaming and keeps everything crisp.
- Let rest 2 minutes before serving — this lets the crust set and locks in juices.
7. Variations & Substitutions
Gluten-Free: Swap all-purpose flour for a 1:1 GF blend (like Bob’s Red Mill), and ensure cornstarch is certified GF. For grain-free, use almond flour or crushed pork rinds.
Spicy Kick: Add 1 tsp cayenne + ½ tsp chipotle powder to the flour mix. Serve with spicy chipotle mayo.
Herb-Crusted: Stir in 1 tbsp dried dill, 1 tsp dried thyme, and ½ tsp dried mustard into the flour.
Dairy-Free: Use unsweetened almond milk + 1 tbsp lemon juice instead of buttermilk. The acid still tenderizes beautifully.
Keto-Friendly: Replace flour with almond flour + 2 tbsp psyllium husk for binding. Serve with zucchini fries or roasted cauliflower.
8. Storage & Reheating
Refrigerator: Store cooled tenders in an airtight container (like the JoyJolt Airtight Glass Food Storage Set) for up to 3 days.
Reheating: For best results, use an air fryer at 375°F for 4–5 minutes — restores crispiness better than the microwave.
Freezer: Place uncooked, breaded tenders on a parchment-lined tray and freeze until solid. Transfer to a freezer bag. Cook from frozen — add 2–3 minutes to air fry or 3–4 to pan-fry time.
9. FAQ
Q: Why did my chicken tenders turn out greasy?
A: Oil temperature was too low, or the chicken wasn’t patted dry after buttermilk soaking. Also, overcrowding the pan drops the oil temp fast.
Q: Can I bake these instead of frying?
A: Yes! Bake at 425°F on a wire rack over a baking sheet for 15–18 minutes, flipping once. Spray with oil before baking for extra crispness.
Q: What to serve with homemade chicken tenders?
A: Our Super Bowl Snack Platter features these tenders alongside blue cheese dip, celery, carrots, and loaded fries.
Q: Are these truly Chick-Fil-A copycat?
A: We’ve tested over 15 versions to match the texture — the key is the buttermilk brine, cornstarch dredge, and the specific blend of seasoning. Close enough to fool a true Chick-Fil-A fan!
10. Conclusion
These homemade chicken tenders bring together nostalgia, restaurant-quality crunch, and total kitchen control in one simple, joyful recipe. Whether you air fry them on a weeknight or serve them as game-day fare, this tender, juicy, golden-brown favorite is sure to become a staple. Want more crowd-pleasers? Dive into our Dump-and-Go Smothered Pork Chops or Ultimate Moist Chocolate Banana Bread for dessert — because balance matters! 🍌🍞
Print
Homemade Crispy Chicken Tenders Recipe
Juicy, homestyle chicken tenders with a golden, crispy coating—better than takeout and ready in under 30 minutes.
- Total Time: 25 minutes
- Yield: 4 servings 1x
Ingredients
- 1 lb boneless, skinless chicken breasts, cut into strips
- 1 cup buttermilk
- 1 tsp paprika
- 1 tsp garlic powder
- 1 tsp onion powder
- 1 tsp salt
- ½ tsp black pepper
- 1 tsp drying agent (e.g., 1 tbsp cornstarch or 2 tbsp flour)
- 1 cup all-purpose flour
- 1 egg, beaten
- Peanut oil or vegetable oil, for frying
Instructions
- In a bowl, combine buttermilk, paprika, garlic powder, onion powder, salt, pepper, and drying agent. Add chicken and marinate at least 30 minutes (or up to 4 hours).
- Prepare a dredging station: Season flour with extra salt and pepper. In a second bowl, beat the egg.
- Dip each chicken strip into flour, shaking off excess; then dip into egg; then into flour again, pressing gently to adhere.
- Heat ½ inch oil in a skillet over medium-high heat to 350°F (325°F for second fry).
- Fry tenders 3–4 minutes per batch until golden brown and internal temp reaches 165°F. Drain on a wire rack.
- Repeat for second fry (optional for extra crunch) at 375°F for 30–60 seconds.
Notes
- For gluten-free: use almond flour and gluten-free buttermilk substitute.
- Double-breading adds crunch—don’t skip the egg dip!
- Rest fried tenders on a wire rack instead of paper towels to stay crispy.
- Prep Time: 15 minutes
- Cook Time: 10 minutes
- Method: Frying
- Cuisine: American
- Diet: High Protein
Nutrition
- Serving Size: 3 tenders
- Calories: 380 Kcal
- Sugar: 1g
- Sodium: 620mg
- Fat: 22g
- Saturated Fat: 4g
- Unsaturated Fat: 15g
- Trans Fat: 0g
- Carbohydrates: 28g
- Fiber: 1g
- Protein: 31g
- Cholesterol: 105mg