Bread Pan with Lid: The Secret to Perfectly Baked Bread at Home 🍞✨👌
1. Introduction: Unlocking Baking Perfection with a Bread Pan with Lid
Have you ever wondered how to achieve that perfect homemade loaf with a wonderfully crunchy crust and a pillowy soft interior? The answer often lies in using a bread pan with lid. This fantastic kitchen tool isn’t just another gadget; it strategically traps moisture during baking, creating a steamy environment that is absolutely essential for achieving bread perfection. The enclosed space encourages the dough to rise evenly and develop that signature crust. In today’s comprehensive guide, we’ll walk you through a simple yet incredibly delicious recipe using a bread pan with lid, ensuring a delightful and successful baking experience right in the comfort of your own home. Whether you’re a seasoned baker or just starting, this bread recipe is sure to impress. If you’re looking for other baking inspiration, explore these breakfast recipes.
2. Ingredients for the Best Homemade Bread
To get started on baking your perfect loaf using a bread pan with lid, gather these simple yet crucial ingredients. Using high-quality ingredients will significantly enhance the flavor and texture of your bread.
- 3 cups all-purpose flour (or bread flour for a chewier texture)
- 1 packet (2 ¼ tsp) active dry yeast
- 1 ½ cups warm water (110°F – use a thermometer to ensure accuracy)
- 1 tbsp granulated sugar (provides food for the yeast)
- 1 tsp salt (enhances flavor and controls yeast activity)
- 2 tbsp olive oil (adds moisture and improves the bread’s texture)
Thinking about another delicious baked treat? Why not check out this sweet glazed apple fritters recipe?
3. Preparation Steps: Crafting Your Loaf
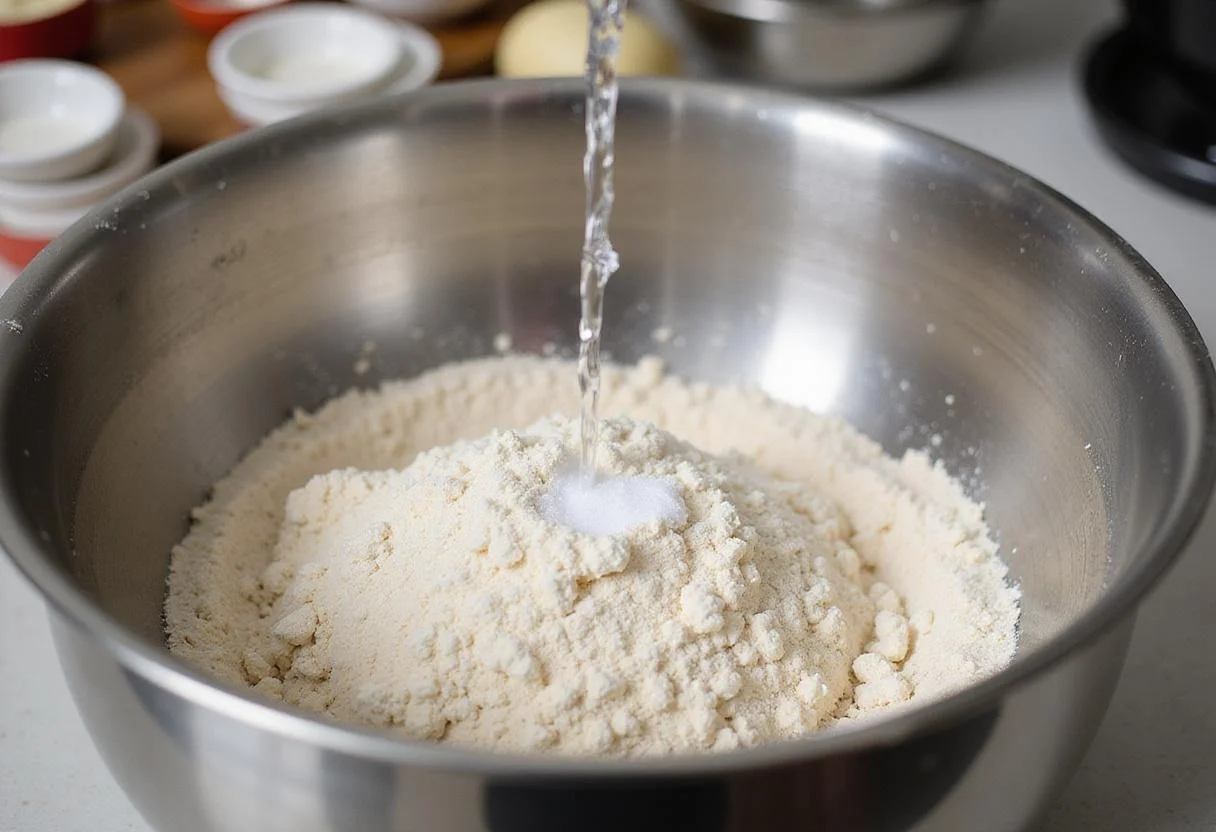
Step 1: Mixing the Ingredients – The Foundation of Flavor
In a large stainless steel bowl, combine the warm water, sugar, and active dry yeast. Let this mixture sit undisturbed for about 5 minutes, or until it becomes frothy. This step is essential to ensure the yeast is active and ready to leaven your bread. Next, add the flour, salt, and olive oil to the bubbly yeast mixture. Stir with a wooden spoon or spatula until a shaggy dough forms. Don’t overmix at this stage; just ensure all ingredients are well incorporated.
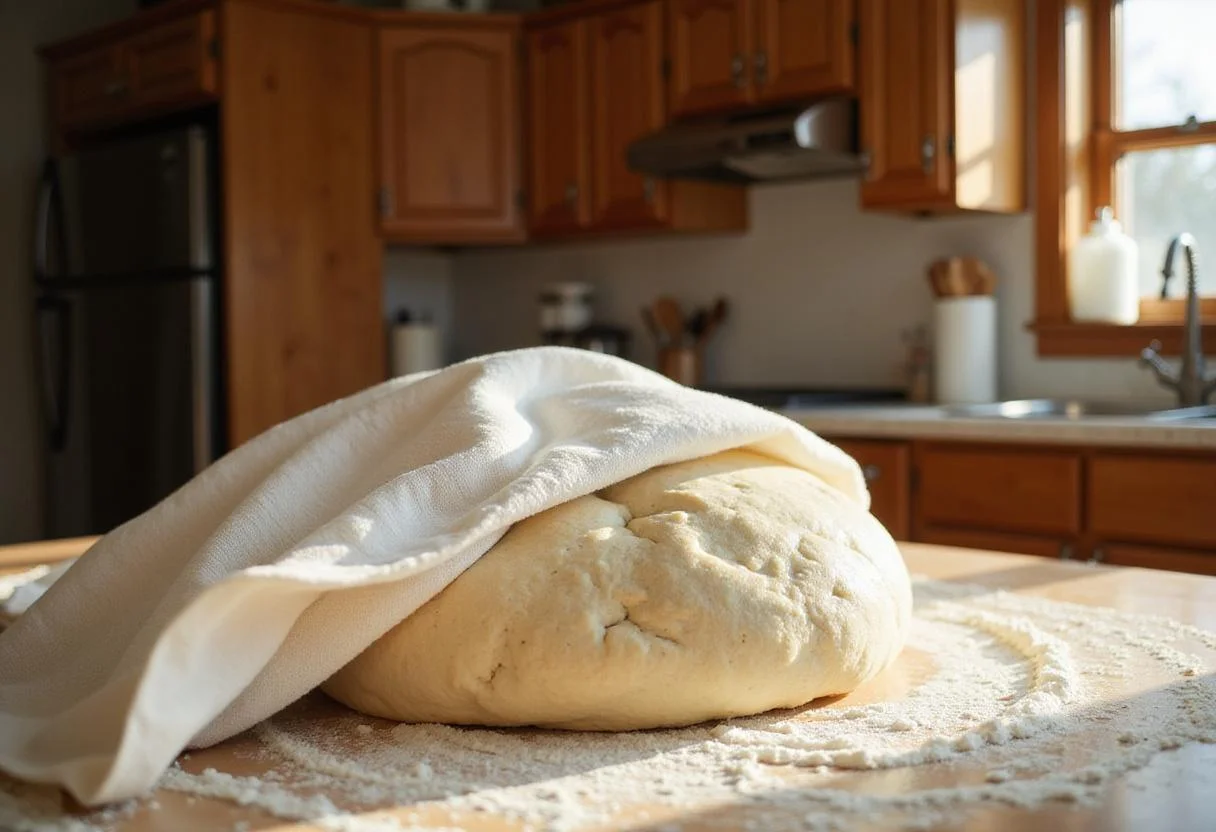
Step 2: First Rising – Unleashing the Fluffiness
Cover the bowl tightly with a clean kitchen towel or plastic wrap. Place the bowl in a warm, draft-free environment for about 1 hour, or until the dough doubles in size. This first rise is crucial for developing the bread’s flavor and light texture. A warm environment encourages the yeast to ferment properly. This step ensures that your homemade bread will have a light and airy texture, a characteristic that the bread pan with lid enhances beautifully. For another soft and airy bread option, consider making these nutritious Hawaiian roll delights.
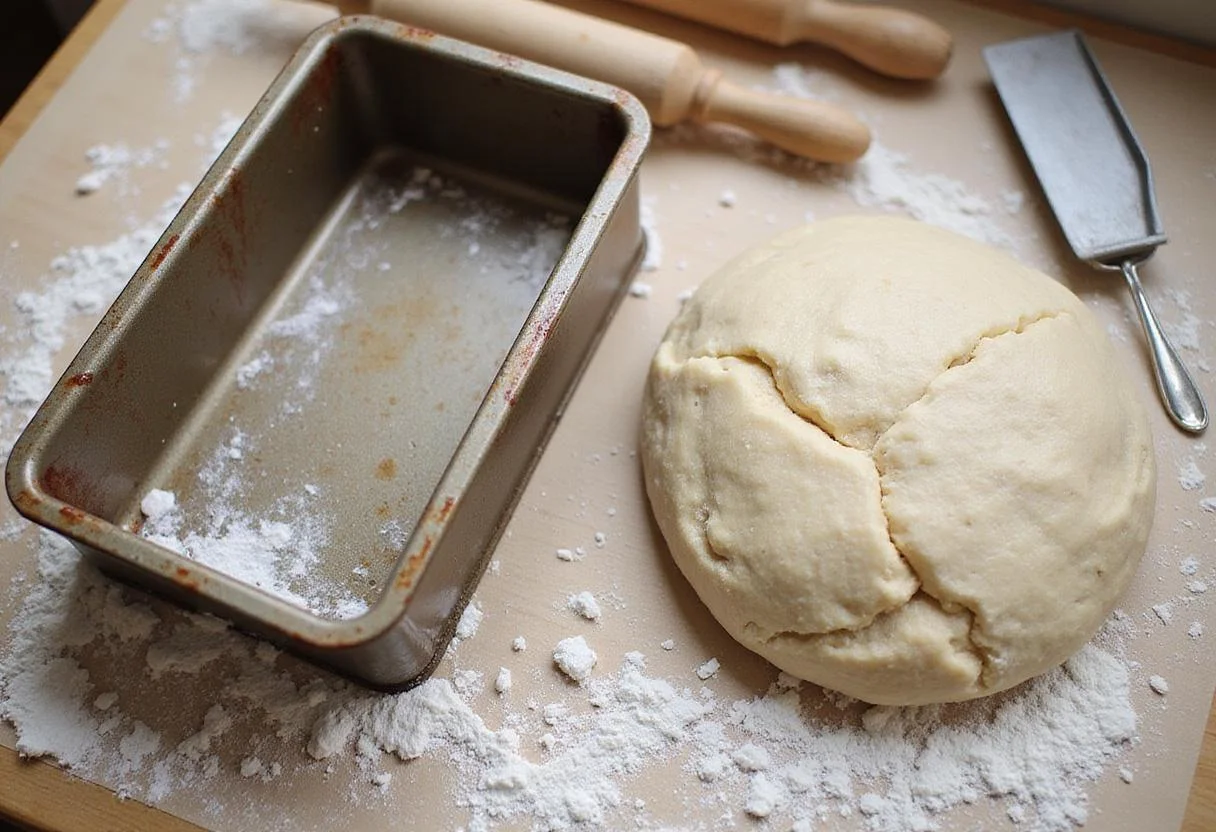
Step 3: Shaping the Dough – Precision for Perfection
Once the dough has gloriously risen, gently punch it down to release any excess air. Transfer the dough onto a lightly floured countertop. Gently shape the dough into a loaf that fits comfortably into your bread pan with lid. Ensure the loaf is evenly shaped to promote uniform baking. Place the shaped dough into the greased bread pan with lid. Allow it to rest and rise again for about 30 minutes while preheating your oven to 450°F (230°C). This second rise helps achieve a lighter and more airy crumb.
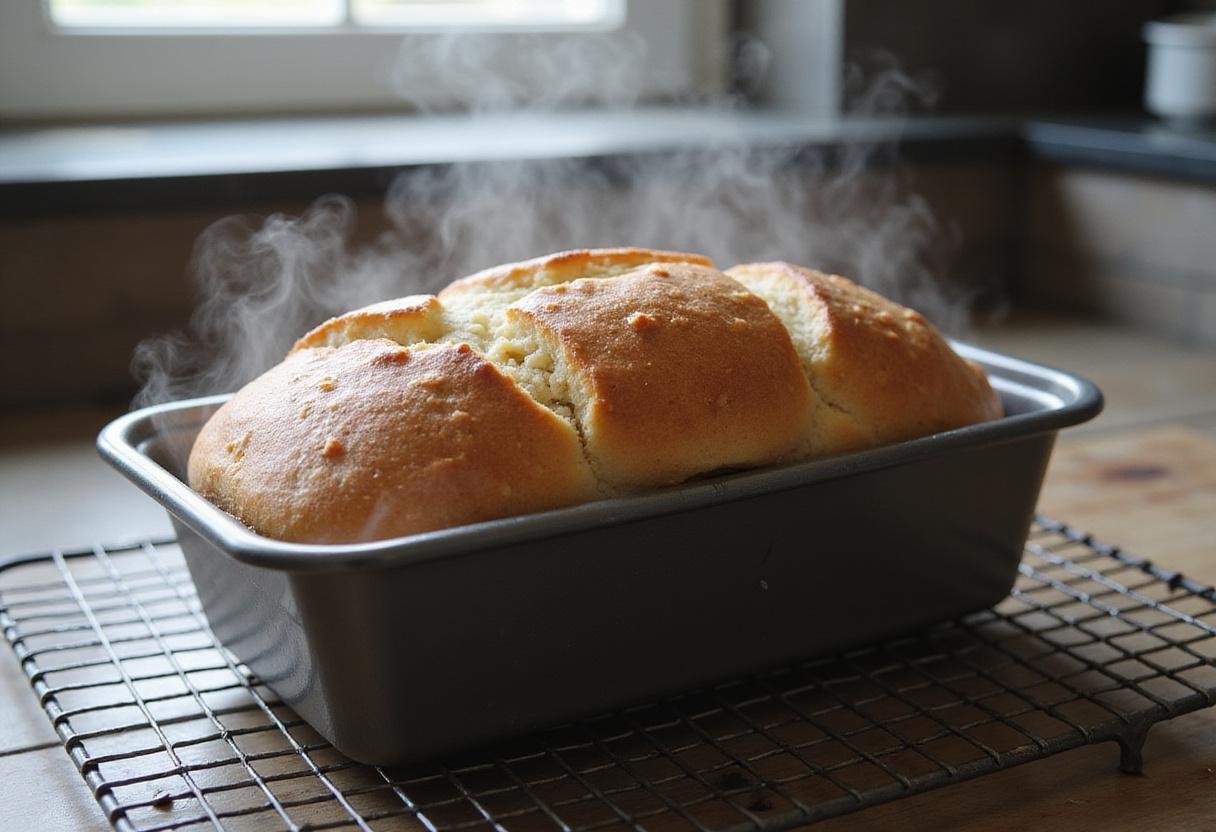
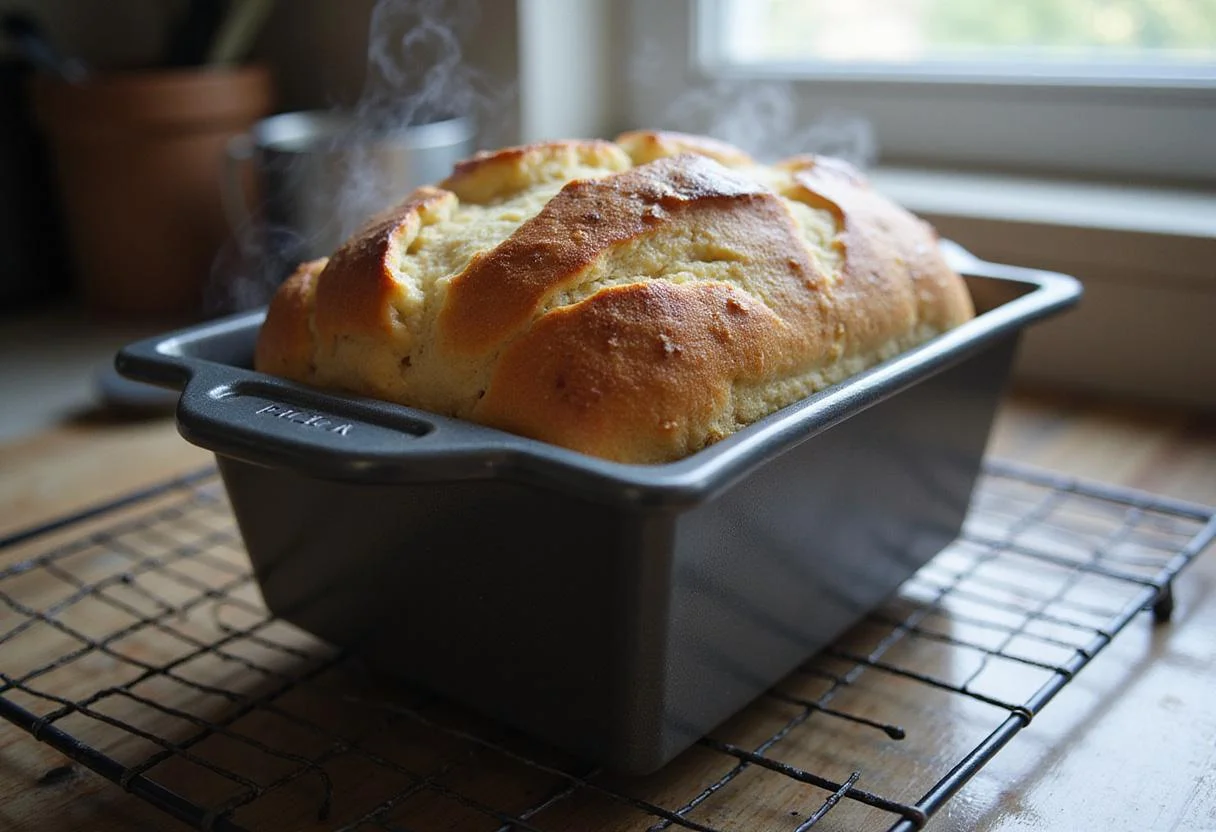
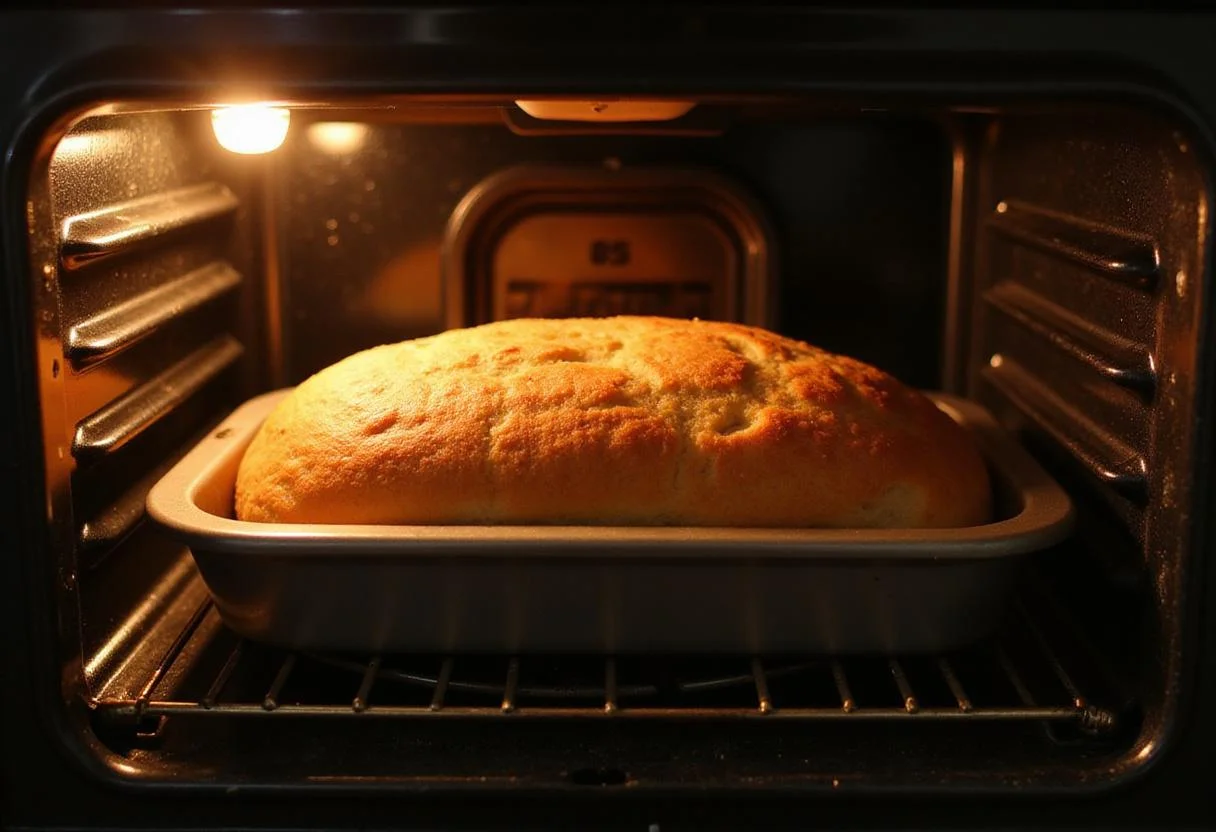
Step 4: Baking the Bread – The Grand Finale
After the second rise, carefully cover the bread pan with lid and place it in the preheated oven. Bake for 30 minutes with the lid on. Then, carefully remove the lid and bake for an additional 10-15 minutes, or until the bread is deeply golden brown and sounds hollow when tapped on the bottom. This two-stage baking process ensures that your loaf retains optimum moisture while also achieving a perfectly crisp crust, thanks to the bread pan with lid. For a perfect bake every time, consider investing in a high-quality bread pan, like this one from USA Pan.
4. Storage Tips: Keeping Your Bread Fresh
Once your beautiful loaf of bread has completely cooled on a wire rack, store it properly to maintain its delightful freshness. Keep it in a bread box or a sealed plastic bag at room temperature. If you want to store it for a longer period, slicing the bread and freezing it in an airtight container is the best method. The consistent baking environment created by the bread pan with lid ensures great results, but proper storage will keep the bread enjoyable for days. Are you in the mood for another baking experience? Discover this moist delicious zucchini bread recipe!
5. Serving Suggestions: Endless Culinary Adventures
Now that you’ve baked your perfect loaf, it’s time to enjoy the fruits (or, in this case, the bread) of your labor! Enjoy your freshly baked bread warm with a generous spread of butter, or use it to create scrumptious sandwiches. It can also be a lovely accompaniment to hearty soups or fresh salads for a wholesome and satisfying meal. The possibilities are truly endless when you have a delicious, homemade loaf baked to perfection in a bread pan with lid! Don’t forget to try it toasted for breakfast, or transformed into delectable croutons. Or maybe you can try to make a BC St. Ignace Pizza?
6. FAQs: Your Burning Baking Questions Answered
Q1: Can I use a different type of flour for baking the bread?
A1: Absolutely! While all-purpose flour works wonderfully, you can substitute it with whole wheat flour for a nuttier flavor or bread flour for a chewier texture. Keep in mind that these substitutions may slightly alter the overall texture and taste of the final product. Experiment and find your favorite combination!
Q2: What should I do if I don’t have a lid for my bread pan? Is it still possible to bake the bread properly?
A2: If you don’t have a lid specifically designed for your bread pan, don’t worry! You can easily replicate the steamy environment by covering the pan tightly with aluminum foil during the first half of the baking process. This will help trap the moisture and ensure a soft interior.
Q3: How can I tell when my bread is perfectly done? What are the key indicators to look for?
A3: The most reliable method is to check the internal temperature of the bread using a kitchen thermometer. It should reach around 200-210°F (93-99°C). Another common method is to tap the bottom of the loaf. If it sounds hollow, the bread is most likely done. Also, look for a deep golden-brown color on the crust.
7. Conclusion: Embrace the Art of Home Baking
Baking bread at home can be an incredibly rewarding experience, offering both relaxation and the satisfaction of creating something delicious with your own hands. Using a high-quality bread pan with lid not only simplifies the entire process but also ensures that your loaves turn out consistently perfect, with a moist interior and a beautifully crisp crust. So, why not try this recipe today and enjoy the comforting aroma of freshly baked bread filling your kitchen? Explore the possibilities of different bread recipes and find your new favorite! You might also enjoy this Miche bread loaf recipe for another great bread-baking experience.
“`
Print
Bread Pan with Lid
Discover the secret to perfectly baked bread at home with this easy recipe for a bread pan with lid. Achieve a crunchy crust and soft interior, making your homemade loaves irresistibly delicious.
- Total Time: 1 hour 5 minutes
- Yield: 1 loaf 1x
Ingredients
- 3 cups all-purpose flour
- 1 packet (2 ¼ tsp) active dry yeast
- 1 ½ cups warm water (110°F)
- 1 tbsp sugar
- 1 tsp salt
- 2 tbsp olive oil
Instructions
- In a large stainless steel bowl, combine warm water, sugar, and active dry yeast. Let it sit for about 5 minutes until frothy.
- Add flour, salt, and olive oil to the mixture and stir until a shaggy dough forms.
- Cover the bowl with a towel and let the dough rise in a warm environment for about 1 hour or until it doubles in size.
- Punch down the dough and transfer it onto a floured countertop. Shape into a loaf and place in the bread pan with lid.
- Let it rest and rise for about 30 minutes while preheating the oven to 450°F (230°C).
- Cover the bread pan with lid and bake for 30 minutes, then remove the lid and bake for an additional 10-15 minutes until golden brown.
Notes
- Store cooled bread in a bread box or sealed plastic bag for freshness.
- For longer storage, slice and freeze in an airtight container.
- You may substitute all-purpose flour with whole wheat or bread flour for variation.
- Prep Time: 15 minutes
- Cook Time: 40-45 minutes
- Category: Baking
- Method: Baking
- Cuisine: Homemade
- Diet: Vegetarian
Nutrition
- Serving Size: 1 slice
- Calories: 160 Kcal
- Sugar: 1g
- Sodium: 200mg
- Fat: 4g
- Saturated Fat: 0.5g
- Unsaturated Fat: 3g
- Trans Fat: 0g
- Carbohydrates: 28g
- Fiber: 1g
- Protein: 5g
- Cholesterol: 0mg