© Original recipe by The Recipe Nest ©
🎄✨ Addictive Christmas Tree Cake Truffles: Easy No-Bake Holiday Treat 🎁🎅
1. Introduction
When the holiday season rolls around, everyone craves festive treats that are as delightful to look at as they are to eat. If you’re searching for a fun, no-bake Christmas cake treats that capture the spirit of the season, these Christmas Tree Cake Truffles are perfect. They combine the richness of cake, the crunch of candy coating, and the whimsical charm of green frosting to resemble tiny Christmas trees — all without turning on the oven! This easy holiday dessert is ideal for gift-giving, potlucks, or just indulging in some cheerful snacking.
2. Why You’ll Love This Recipe
- Ready in about 30 minutes — perfect for last-minute holiday planning.
- No baking required, making it a beginner-friendly festive cake ball recipe.
- Customizable flavors and decorations to match your Christmas theme.
- Creates adorable, bite-sized Christmas tree treats that impress guests.
- Uses simple ingredients that are easy to find during the holiday season.
3. Ingredient Notes
For these Christmas tree cake truffles, quality ingredients truly shine. Use a good box of white cake mix for a soft, moist base; opt for a rich and creamy frosting, like cream cheese or buttercream, to help bind the cake crumbs. The green coloring in the frosting brings the festive look, and you can enhance it with a splash of peppermint extract or vanilla for extra flavor. When coating the truffles, high-quality melting wafers or almond bark provide a crisp, smooth shell that melts in your mouth. For toppings, crushed cookies, sprinkles, or edible glitter can add extra holiday sparkle.
4. Kitchen Tools You Need
To make your holiday treats even easier, consider using these helpful kitchen tools. The Compact 6-in-1 Digital Air Fryer assists in quick melting of coatings, saving you time and effort. A sturdy T-fal 14-Piece Hard Anodized Nonstick Cookware Set ensures you have reliable pots and utensils for prepping your ingredients. An electric hand mixer or stand mixer makes mixing and frosting smooth and effortless, especially if you choose the KitchenAid Artisan 5-Quart Stand Mixer. These tools streamline the process and help achieve professional-looking results!
5. How to Make Addictive Christmas Tree Cake Truffles
Step 1: Prepare the Cake Base
Begin by baking a simple white cake according to your box directions, then let it cool completely. Once cooled, crumble the cake into fine crumbs using your hands or a food processor. Fill your kitchen with the sweet aroma of baked sponge — inevitable during the holiday season!
Step 2: Mix the Cake with Frosting
Add cream cheese or buttercream frosting to the crumbs, mixing thoroughly until the mixture resembles a dough that’s easy to roll. Shape small triangles or conical shapes to mimic Christmas trees, then chill these in the refrigerator for about 15-20 minutes so they hold their shape.
Step 3: Coat and Decorate
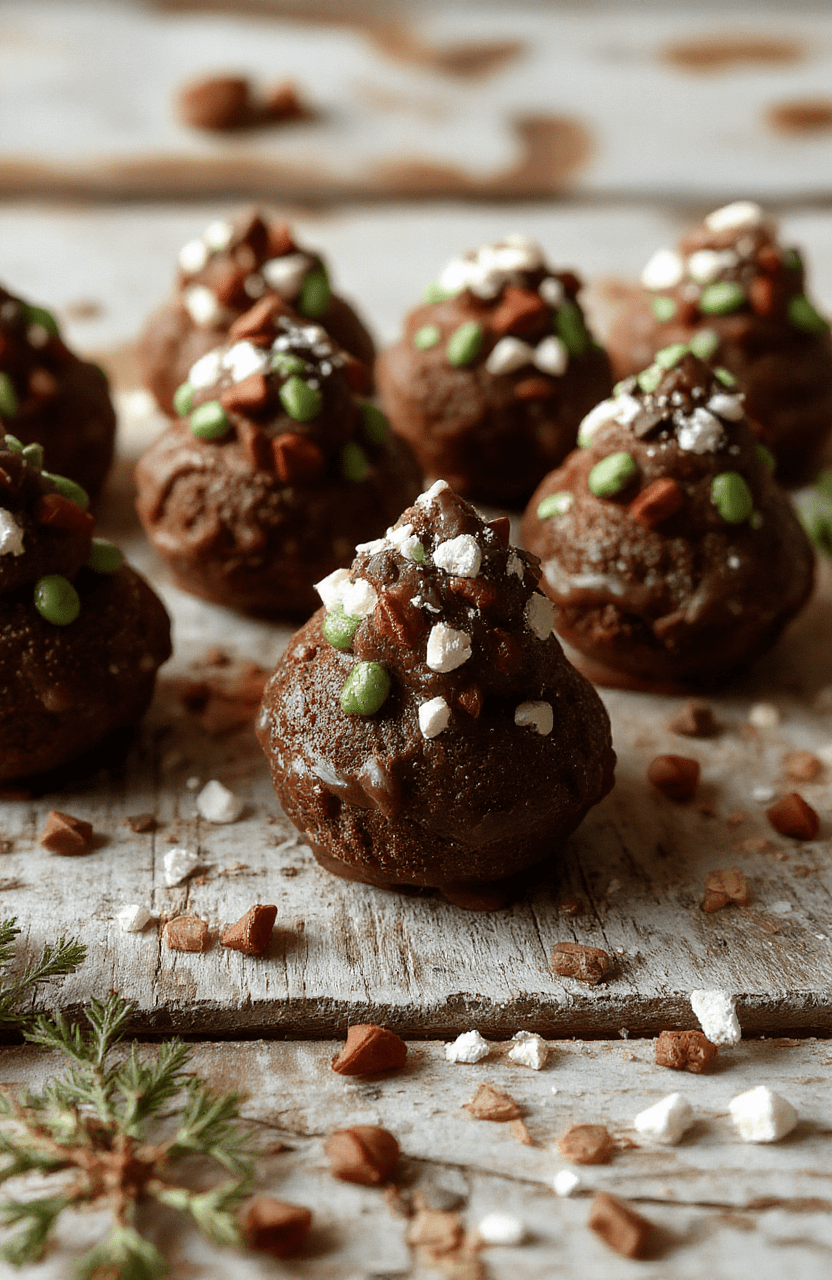
Melt your candy coating or melting wafers using a microwave or a double boiler until smooth. Dip each cake shape into the coating, then place on a parchment-lined tray. While the coating is still wet, sprinkle with crushed cookies or glitter to add a festive flair. Use a toothpick to add mini candy decorations or edible beads to mimic ornaments.
Step 4: Final Touches
Let the decorated truffles set at room temperature or in the fridge until firm. For a more realistic tree, pipe piped frosting “branches” in green on top of the coating. The result? Irresistibly cute, festive cake balls that look just like tiny Christmas trees ready to delight your guests.
6. Expert Tips for Success
- Ensure the cake is completely cooled to prevent the frosting from melting when shaping and coating.
- Use fork tongs or dipping tools for smoother, even coating — no sticky fingers!
- Chill the cake balls briefly before dipping to improve adhesion and prevent cracking.
- Add a splash of peppermint or vanilla in the frosting for an extra holiday twist.
- Get creative with decorations — crushed peppermint candies, colored sprinkles, or edible glitter make them sparkle!
7. Variations & Substitutions
If you prefer a different flavor, swap the vanilla cake for chocolate, or add cocoa powder to the frosting for a hot chocolate effect. For gluten-free options, use gluten-free cake mix and ensure coatings are gluten-free. You can also create vegan treats by choosing dairy-free frosting and plant-based coatings. These versatile Christmas cake treats can be customized to suit any dietary needs or flavor preferences.
8. Storage & Reheating
Store your Christmas tree truffles in an airtight container in the fridge for up to a week. To keep them fresh and flavorful, keep decorations separate until serving. These treats are best enjoyed chilled but can be served at room temperature for a softer texture. For longer storage, freeze them in a sealed container and thaw in the fridge before serving.
9. FAQ
Can I make these Christmas cake treats ahead of time?
Absolutely! Prepare and assemble the truffles a day in advance. Store them in the fridge to keep them fresh and festive.
What are the best coatings for these no-bake Christmas snacks?
High-quality melting wafers, almond bark, or white chocolate chips work beautifully. They melt smoothly and create a crisp coating that holds decorations well.
How do I keep the Christmas tree shape while coating?
Chill the shaped cake balls before dipping, and handle them gently with a dipping fork or tongs. Avoid overworking the coating to prevent cracks.
Can I add alcohol or extracts to flavor these treats?
Yes! A splash of peppermint, almond, or vanilla extract can enhance the holiday flavor profile.
10. Conclusion
These Addictive Christmas Tree Cake Truffles embody the joy of the holiday season with their whimsical look and delicious taste. Easy to make and customizable, they’re sure to become a recurring favorite for your holiday gatherings. Embrace the festive spirit with these adorable, no-bake treats and spread cheer with every bite!
Print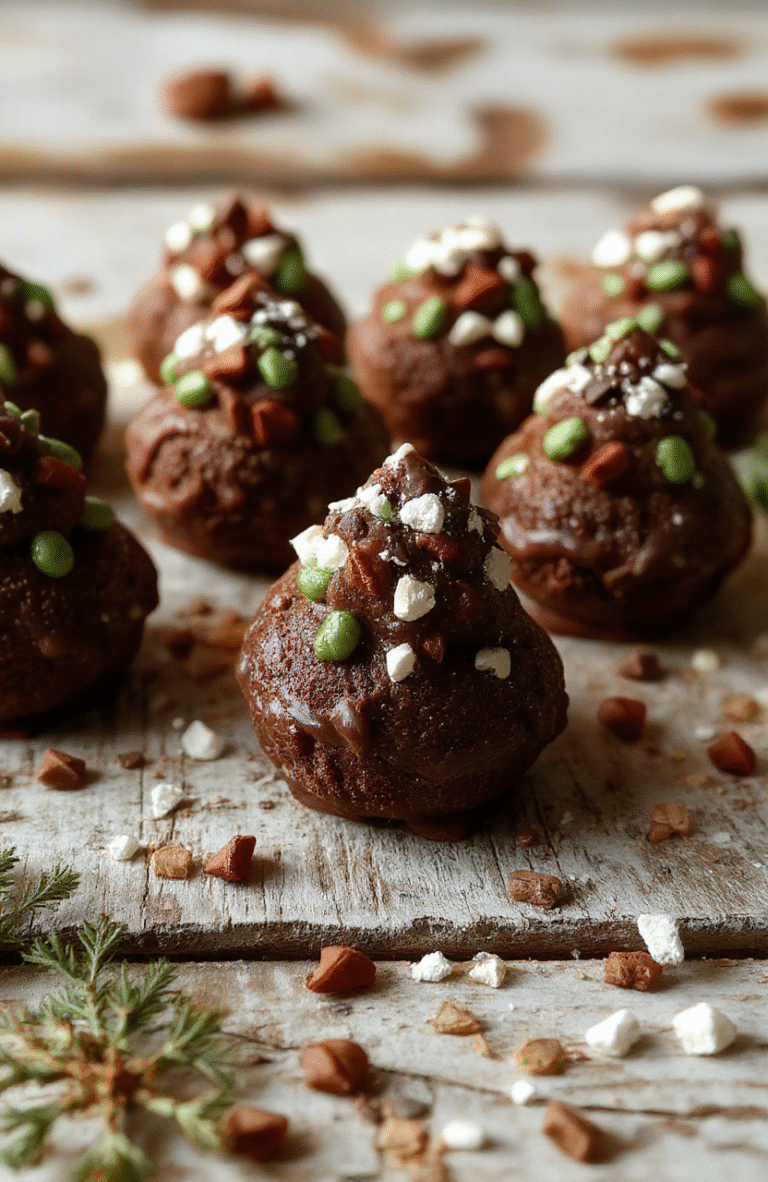
Addictive Christmas Tree Cake Truffles Easy No-Bake Holiday Treat
These no-bake holiday cake truffles are shaped like Christmas trees and decorated with colorful sprinkles, perfect for festive celebrations.
- Total Time: 50 minutes
- Yield: 20 pieces 1x
Ingredients
- 1 box (15 oz) vanilla cake mix
- 1/2 cup (115 g) unsalted butter, softened
- 1 cup (120 g) powdered sugar
- 8 oz (225 g) cream cheese, softened
- Green candy melts or melted white chocolate tinted green
- Red and white sprinkles
Instructions
- Prepare the vanilla cake according to the package instructions and let cool completely.
- Crumble the cooled cake into a large bowl.
- Add softened butter, powdered sugar, and cream cheese; mix until well combined.
- Form the mixture into small Christmas tree shapes and place on a baking sheet lined with parchment paper.
- Chill for 30 minutes.
- Dip each tree into melted green candy melts and decorate with sprinkles.
- Allow to set before serving.
Notes
- You can replace the green coating with white for a snowy effect.
- Use toothpicks for easier dipping.
- Best served chilled.
- Prep Time: 20 minutes
- Cook Time: 0 minutes
- Method: No-Bake
- Cuisine: Holiday
- Diet: Vegetarian
Nutrition
- Serving Size: 1 truffle
- Calories: 85 Kcal
- Sugar: 8g
- Sodium: 20mg
- Fat: 4g
- Saturated Fat: 2g
- Unsaturated Fat: 2g
- Trans Fat: 0g
- Carbohydrates: 12g
- Fiber: 0.5g
- Protein: 1g
- Cholesterol: 10mg